
Going on Vacation
עברית למטה Hi Quilters! I know it’s been a really long time since I’ve posted anything. It’s been a hard, sad, scary and crazy year


The fabric layering part of the background is done. Now it’s time to give it some depth. Why start quilting before the fabric picture is done? Personally, I find it easier to do it sooner than later. Let me go over the pros and cons:
Pros:
Cons:
For me, the pros outweigh the cons. I quilt.
Before you quilt your quilt, it needs to be sandwiched and basted with backing and batting. Depending on the size of your quilt, you may want to use pool noodles. I talk about sandwiching and basting quilts in another blog post.
Let’s analyze the quilt – how should it be quilted? You can’t talk about quilting without talking about thread. There are a few choices here. Do we want the thread to hide in the background or do we want it to show? How often do we want to change our thread? What kind of thread should we use?
I have all sorts of threads – cotton, polyester, metallic, matt, solid color, and multicolor. They are all different weights of threads. I stay away from rayon, because I find it hard to work with – too slippery for me and it breaks too easily. Since these are wall hangings and not bed quilts, any good quality thread will do. I am more inclined to choose a thread by its color than by what it’s made of.
Let’s take it section by section:
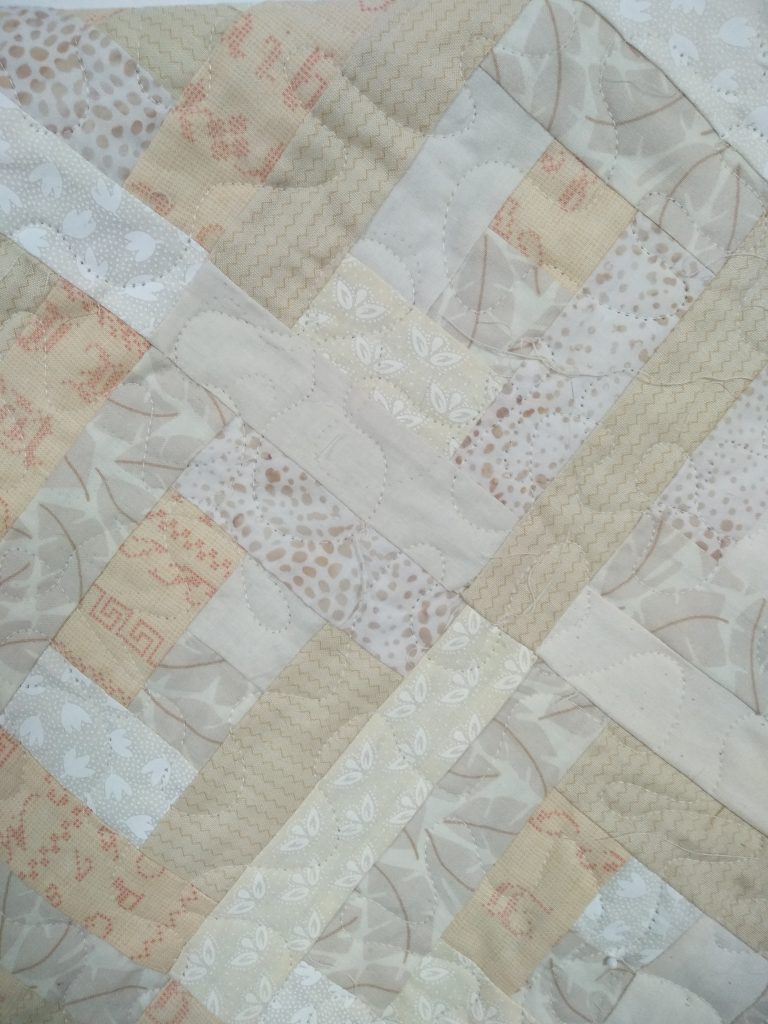
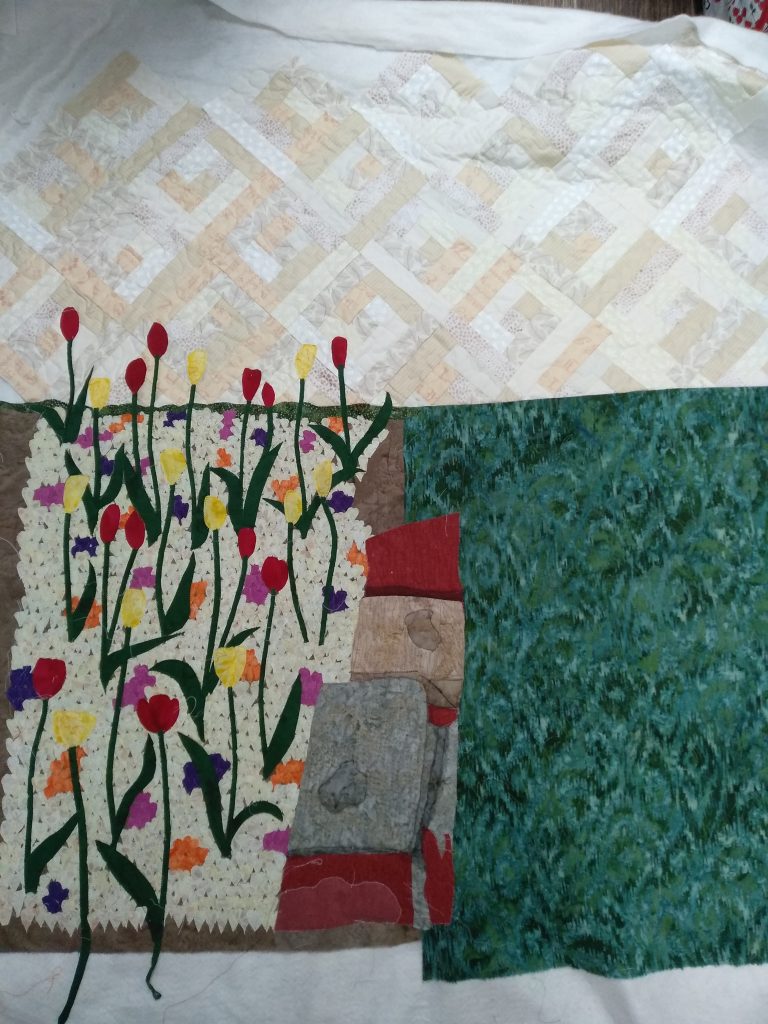
The wall – I worked hard making all those blocks and they already have a nice texture, so I don’t want to cover them up. I used a cream thread that blends. An all-over quilting pattern works well. A simple stipple pattern works well and won’t be distracting.
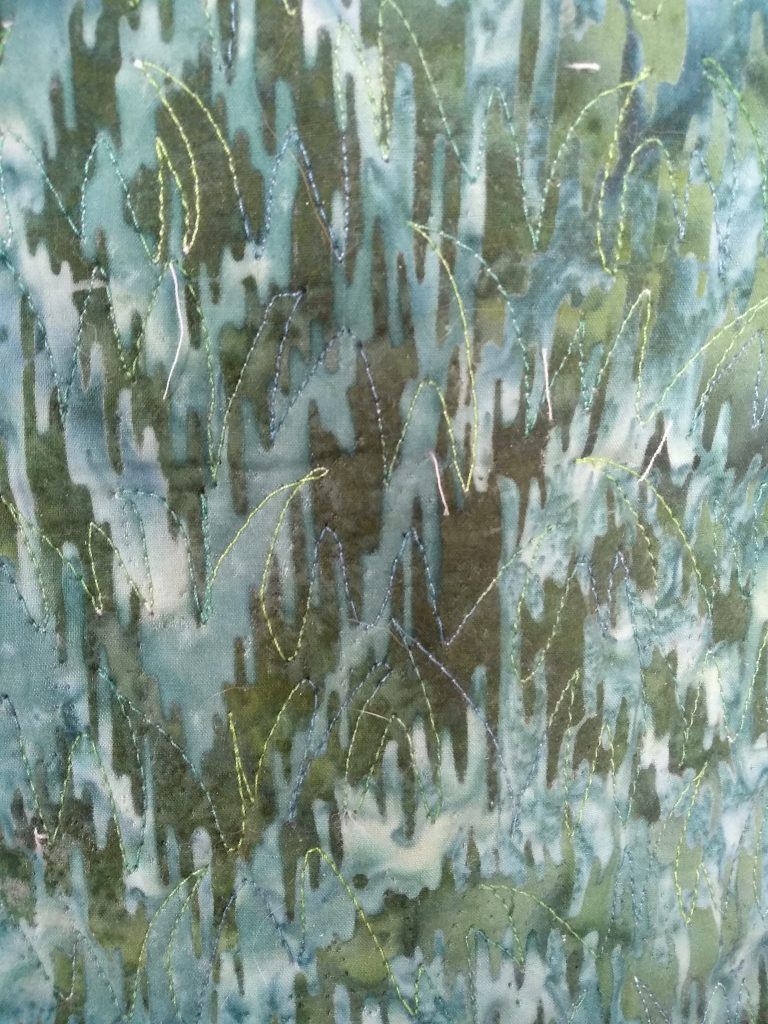
The grass – It’s a big piece of fabric without a lot going on. The direction of the print is vertical, which adds to the grassy look, but there can be more. That said, I still don’t want it to overtake the quilt. I chose a multi-colored green thread. It will show up a bit more, but it will still not stand out too much. To quilt the grass I chose an up and down randomized zigzag pattern. Basically, grass shaped.
The flower garden – the majority of the background is a pale yellow, so that’s the color thread that goes over all the little yellow flowers. I matched the color of the thread to each small flower patch. It was a lot of starting and stopping, but it was worth it. This might have been a good place to use a monofilament thread (a clear, plastic-like thread that doesn’t really show up), but I think that it was worth the time changing threads as I went. Monofilament can give a weird shine sometimes, which I wanted to avoid. Each flower is quilted on the edge to give it a bit more definition and to make sure that it stays in place.
As for the tulips, I used darker shades of red and yellow to make the petals stand out a bit extra. Each petal is outlined.
The stems and leaves were quilted with a solid dark green. If tulips had leaves that had veins in them, as other flowers leaves do, I would have added them. Tulip leaves are pretty dull, so there was no place for embellishment.

As a side note – if you have the choice of a darker or lighter thread to match your fabric, the darker one will probably show up less. I usually go for the darker thread.
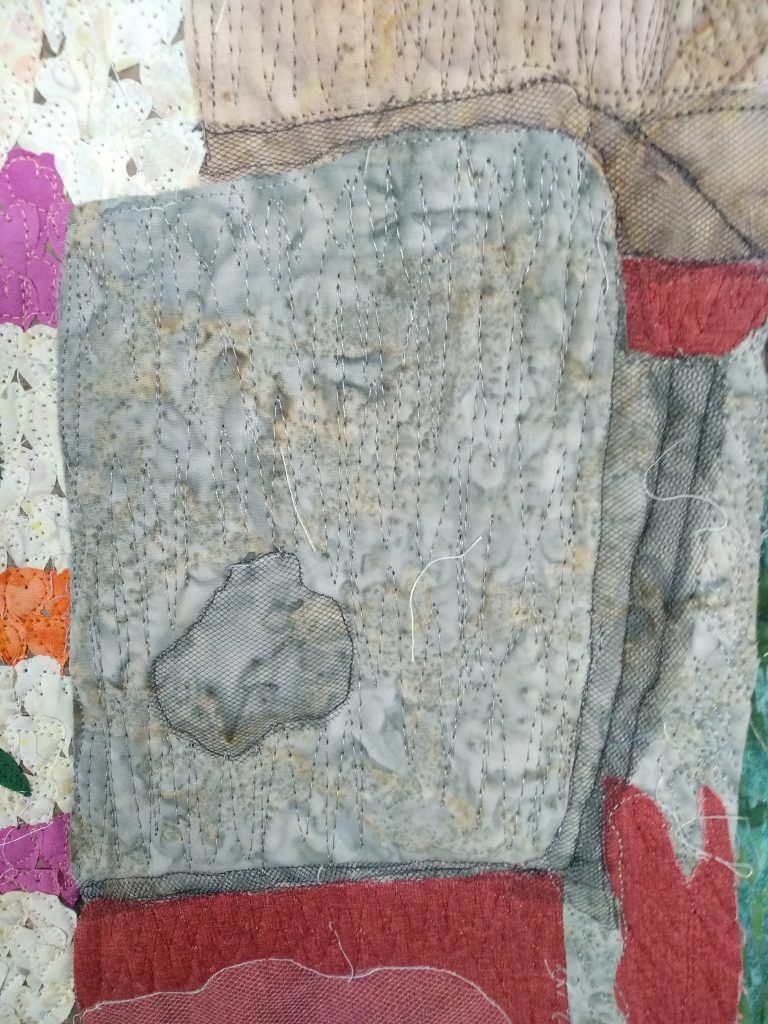
The bricks – I needed to add definition to the bricks. Here the shadows get outlined in dark grey or black. I also tried to give a 3D look to them by quilting directionally. The tulle is tacked down with black or white thread to hold it in place.
Done and done! I’m really please with the overall look of the background.
Now that this part is done, we can focus on the main event. I’ll talk more about that in the next blog post where I start assembling the fabric to make up my granddaughter. Stay tuned!
עברית למטה Hi Quilters! I know it’s been a really long time since I’ve posted anything. It’s been a hard, sad, scary and crazy year

עברית למטה Wow! What a year it’s been. It’s hard to believe that Rosh Hashana is here already. How exciting! There are so many things
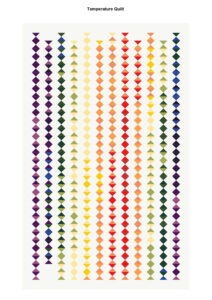
עברית למטה As the year ends and the temperature drops it’s time to think about making a temperature quilt. It’s more fun to quilt when