
Going on Vacation
עברית למטה Hi Quilters! I know it’s been a really long time since I’ve posted anything. It’s been a hard, sad, scary and crazy year


My machine is in the shop again. I have a back up sewing machine – I just got my daughter’s sewing machine fixed – but I decided that I want to start a project that I can take along with me when I go babysitting my grandson.
English Paper piecing is just that kind of project. I’ve done this type of paper piecing before (not to be confused with foundation paper piecing, which is a totally different monster, and can’t be done without a sewing machine.) So far, I’ve only created some cool appliques to add quilt blocks.
This time time I decided to make a full quilt that is completely English Paper pieced. It’s really fun to do that is extremely portable, so no matter where I am, I can still be quilting.
What is English Paper Piecing? Basically, you take card stock papers of specific shapes, put fabric around them, secure the fabric with basting stitches or glue, and sew them together.
It’s really easy to do, although it can be a bit time consuming. If you need to get a quilt done quickly, this is probably not the best way to go about it.
Although I haven’t found pre-cut paper piecing shapes in Israel, they do sell them on Amazon for good prices. If I have someone visiting from the US, I’ll have them bring a bunch over. You can also get them from the people that I buy from in the US and have sent here: The Fat Quarter Shop and The Missouri Star Quilt Company.
If you can’t buy these cards, you can make them yourself. Just me sure that they are all the same size.
Because I know this is going to take me quite a while to complete, I decided to use leftover fabric from a quilt that I recently finished. I have a lot of fabric left, so I’m not worried about running out of anything. If I were to use something new, I think that I would be a lot more impatient to see what is going to come out of it.
You can go wild with cutting the fabric and however is comes out, it comes out, or you can be more precise with your cutting and make more like a kaleidoscope type of affect. I’m doing a bit of both.
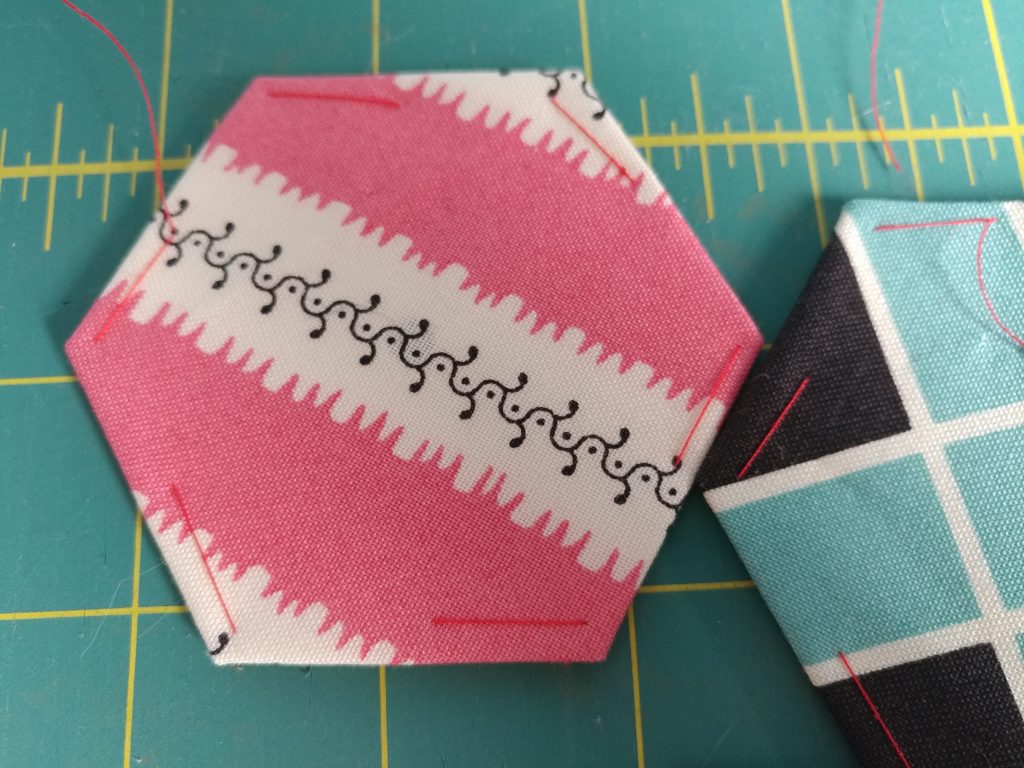
I used the paper piece as my guide for cutting, and cut and extra 1/4 inch around the piece. For cutting them out, I pin the paper pieces on the fabric and cut around them, eyeballing about a 1/4 inch, but if you don’t feel feel comfortable doing that, you can trace the piece and measure the 1/4 inch around it.
After the fabric is cut out, baste or glue the fabric around the edges, securing the fabric down. I like to baste. When doing this, I sewed through the paper. I use a contrasting thread so that it will be easy to see when I remove it later, after the pieces have been attached together.
After my pieces are ready, it’s time to sew them together. I switched up my thread to one that blends with my fabric. I put the pieces edge to edge, and take small bites of fabric with each stitch. I am careful not to sew through the paper. The stitches that I use are really small, one next to the other, until the pieces are together.
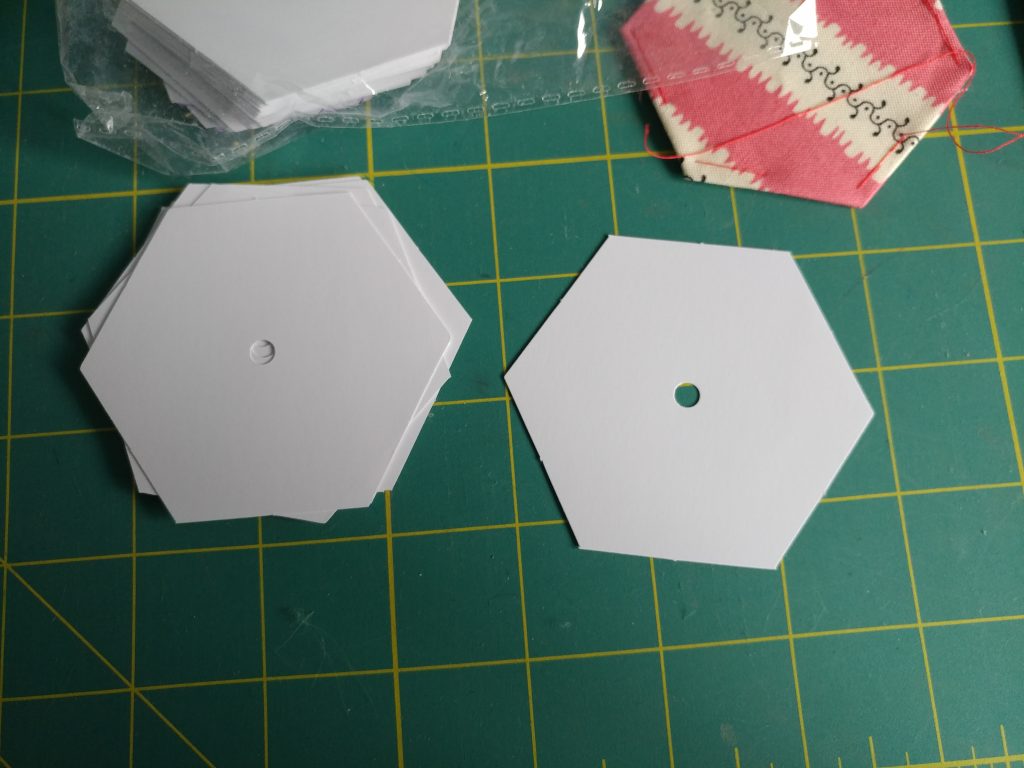
Once my pieces are joined, I press the fabric with a dry iron. Then I take out the basting stitches, and carefully remove the papers. I will then press it again well with steam. If you have spray starch, this is a good time to use it.
I save the papers after I remove them from my project – they can be reused, even if they have a few holes in them.
I am using hexagons in my current project, but there are a bunch of different shapes out there, including clam shells, diamonds and apple cores.
Like I said, I have never done a full quilt this way. It will be interesting to see how long it actually takes me. No matter how long that is, I’ll have fun along the way.
עברית למטה Hi Quilters! I know it’s been a really long time since I’ve posted anything. It’s been a hard, sad, scary and crazy year

עברית למטה Wow! What a year it’s been. It’s hard to believe that Rosh Hashana is here already. How exciting! There are so many things
עברית למטה As the year ends and the temperature drops it’s time to think about making a temperature quilt. It’s more fun to quilt when