
Going on Vacation
עברית למטה Hi Quilters! I know it’s been a really long time since I’ve posted anything. It’s been a hard, sad, scary and crazy year


I finally finished a fabric collage of a cat that I started almost a year ago. I had learned the technique from Phyllis Cullen at a class she taught, given by the Israel Quilter’s Association. I had finished the actual collage in her class, but I didn’t get around to quilting it until a couple of weeks ago. I’m so glad I did! I love the way it came out.
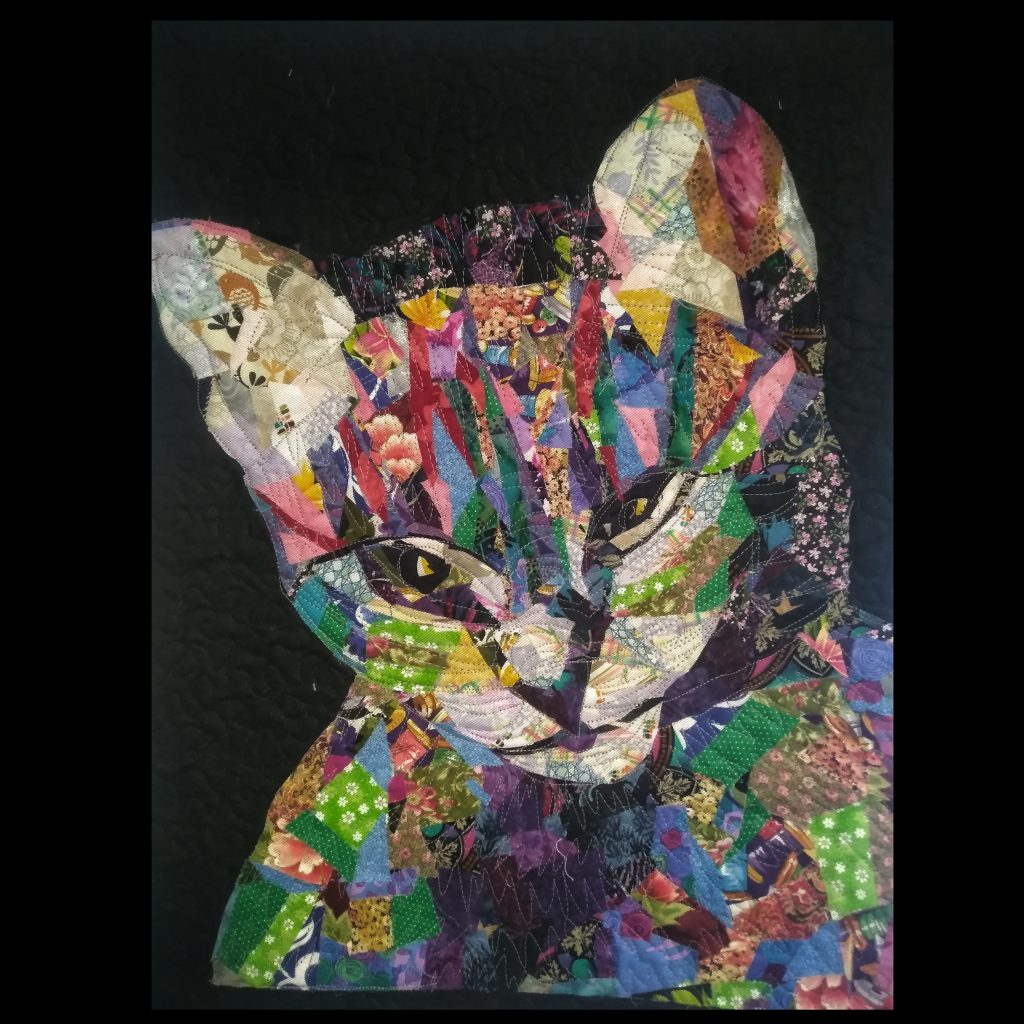
After I finished it, I posted it on a Facebook group for scrap quilters. Fabric collage is the ultimate in scrap quilting. It got a very good reception, and I was asked how I did it. That’s where this blog post comes in.
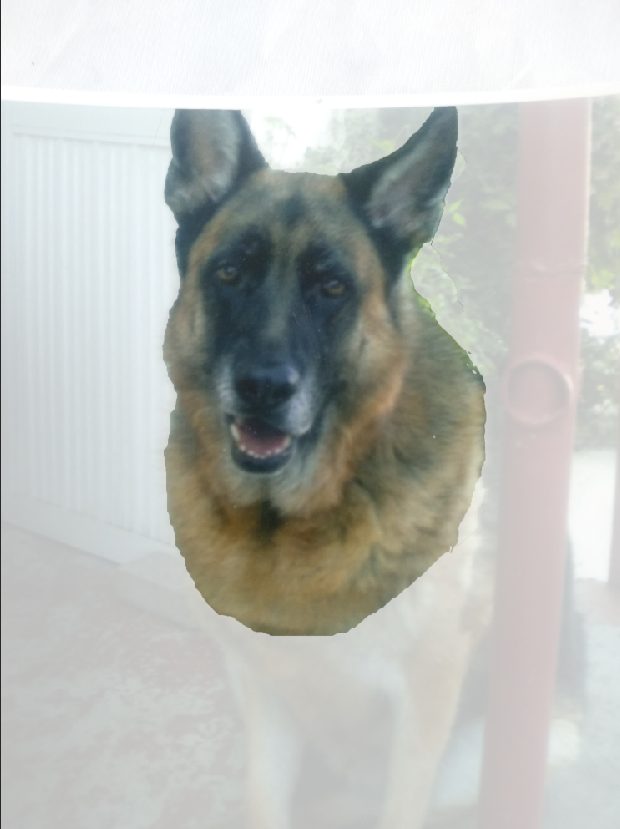
When my mother saw the cat. Her first reaction was where’s mine? She has been asking me to make a quilt of her favorite dog, Quanna for years. I thought that this would be a great opportunity for me to do just that.
I work in Photoshop. If you don’t, you can use any photo editing software to enlarge the image. I separated my mother’s dog from the background. If that’s too much, you can skip that part and just start after printing out your image.
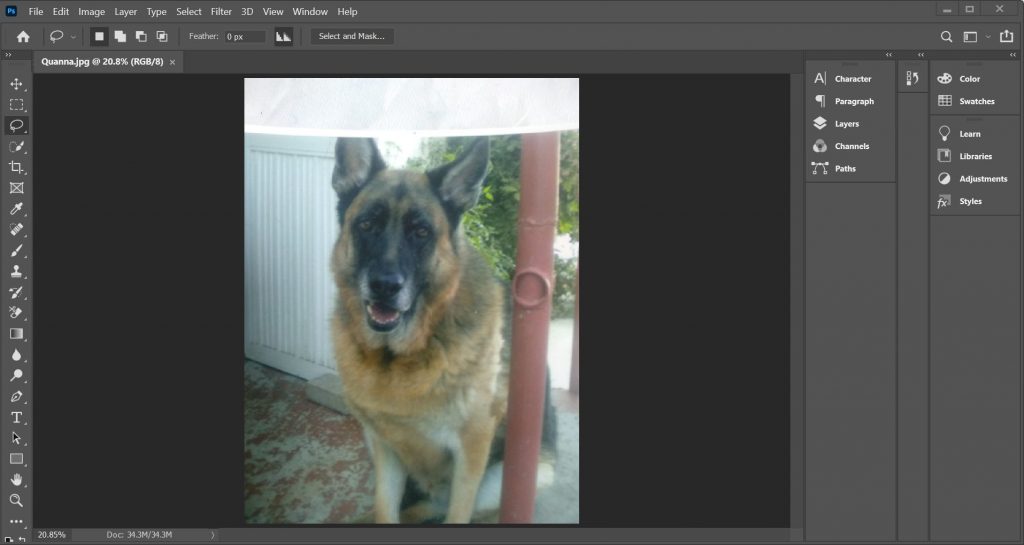
My mother had a photograph of Quanna that she wanted me to use, so I took a picture of it on my phone and opened it in Photoshop. For this technique, if you don’t have the highest resolution, you’ll still be fine.
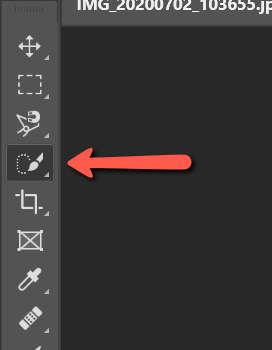
I then used Photoshop to trace out the dog. There are a few ways to do that, but I like using the quick select tool.
After selecting the tool, drag your mouse over the image. The computer does a pretty good job of figuring out what to select by itself.
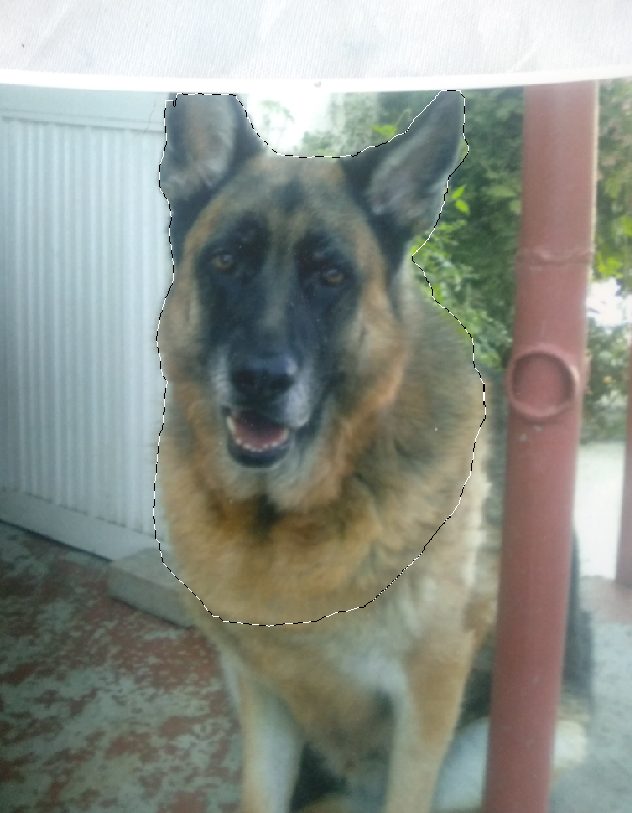
To refine the selection, you can either add or subtract sections by selecting the tool with the + or – sign in the menu

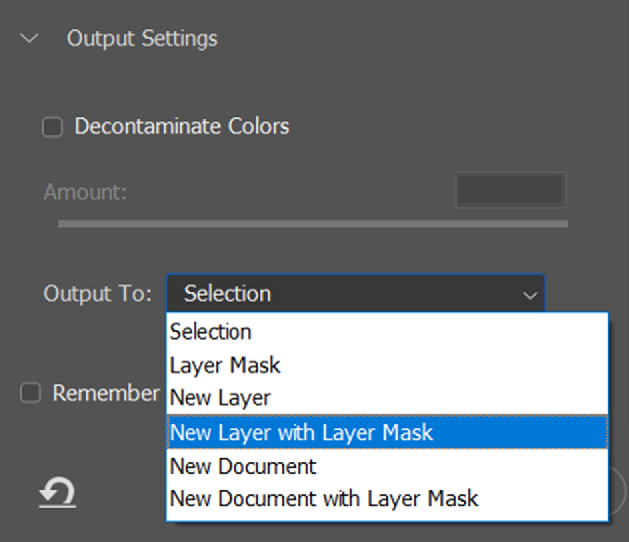
Once you are happy with your selection, click [Select and Mask] in the tool bar.

You’ll see your image with the background faded out. On the right side of the screen, in the output settings, select [New Layer with Layer Mask]. That will make the selection, and jump you back to the main Photoshop editing screen.
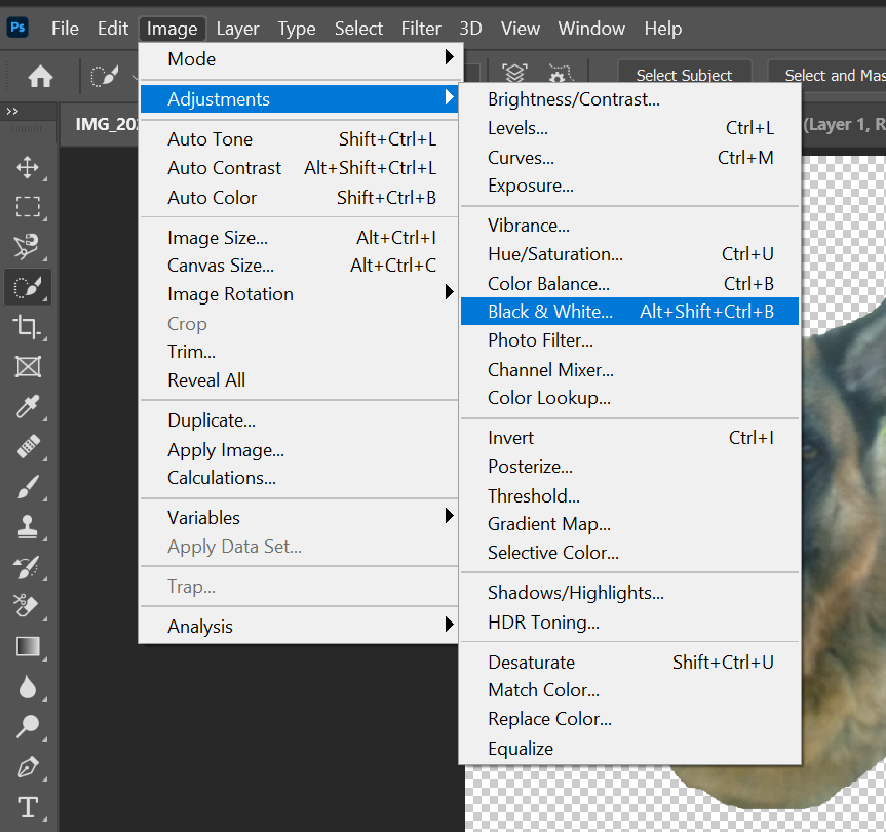
Now that we basically have what we want, let’s turn it to black and white. When making fabric collages, the only thing that we really care about is light, medium, and dark. In the menu, select Image -> Adjustments -> Black & White.
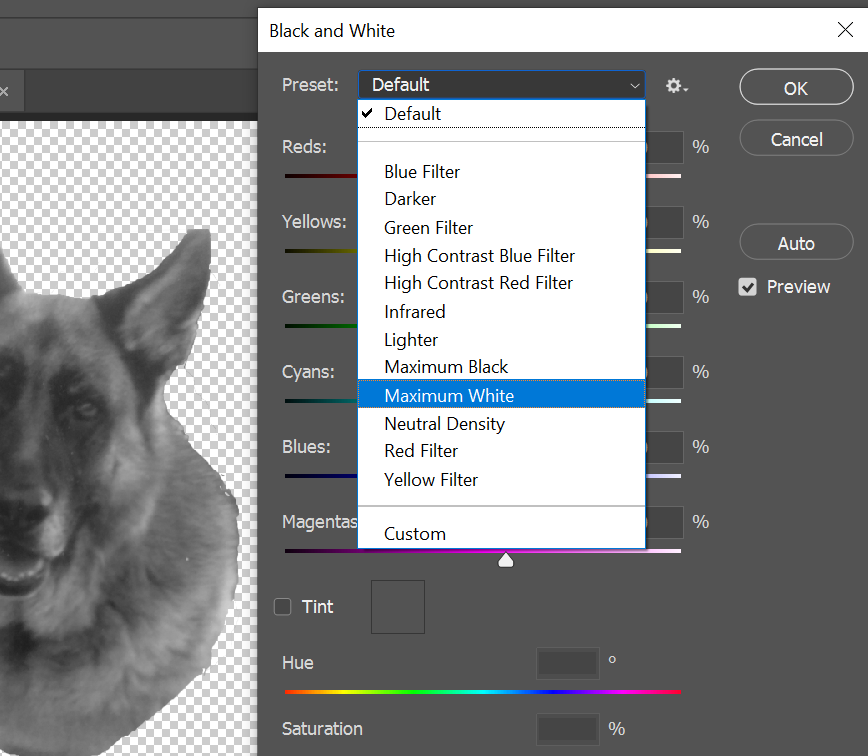
I like to play around with the presets. The image looked a bit dark to me, so I changed it to Maximum White and saved it.
If you didn’t remove the background from your image, set your image to black and white (as described above) and continue from here.
Now it’s time to crop and set the image size. I go over that in my previous blog post, Art Quilting: Modifying and Printing Your Image. I set the image of Quanna to be 16 images across and I printed it out.
I have a lightbox. I purchased it on Ali Express not knowing if I’d really use it. I use it all the time. A good size for a lightbox is A2. It’s not too big, but it’s big enough for the majority of the art quilts that I create. Having a lightbox is not 100% necessary, but it makes things easier, which makes me happy. If you don’t have a lightbox, you can tape your printed image to a window and use the sun as your light source to trace images.
Now the tracing begins. Put the image on the lightbox and put the tracing paper over it. What we want to do is to define the areas of light, dark and medium. I then mark each section with L, M and D.

In the original photo, Quanna’s ear was cut off, so I added it back. You don’t need to be super exact with your tracing. A general outline works well.
Now it’s time to copy over your pattern on to the stabilizer. In Israel, you can purchase Cotton Fix from Madeira. What we are basically looking for is a stabilizer that has a peel back sticky side. Flip over what you traced on your tracing paper. With a dark marker, copy over the mirror image, including the letters for L, M, and D on to the stabilizer, on the side that does NOT peel away.
This is where all the scraps come in. I have a serious problem. I can’t throw away any fabric. I have zip lock bags full of tiny scraps that take up way too much space in my house. Until I started doing these quilts, I thought that I would use them as stuffing for a dog bed that I still haven’t made. Now I have another excuse to keep them.
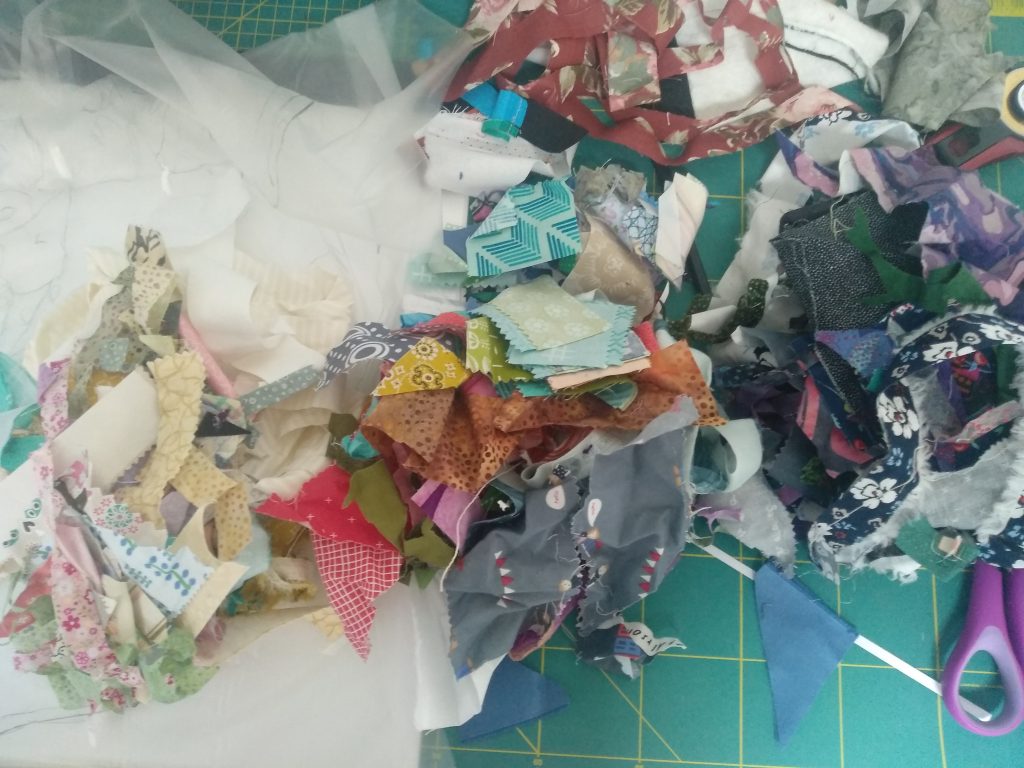
If you have small scraps, great. If not, you’ll need to cut some fabric to make scraps. Separate your fabric into light, medium and dark piles. The more different types of fabric you have, the better.
Start from the edge and work your way up. Peel back the paper a little bit at a time, filling in each section with the correct color of fabric.
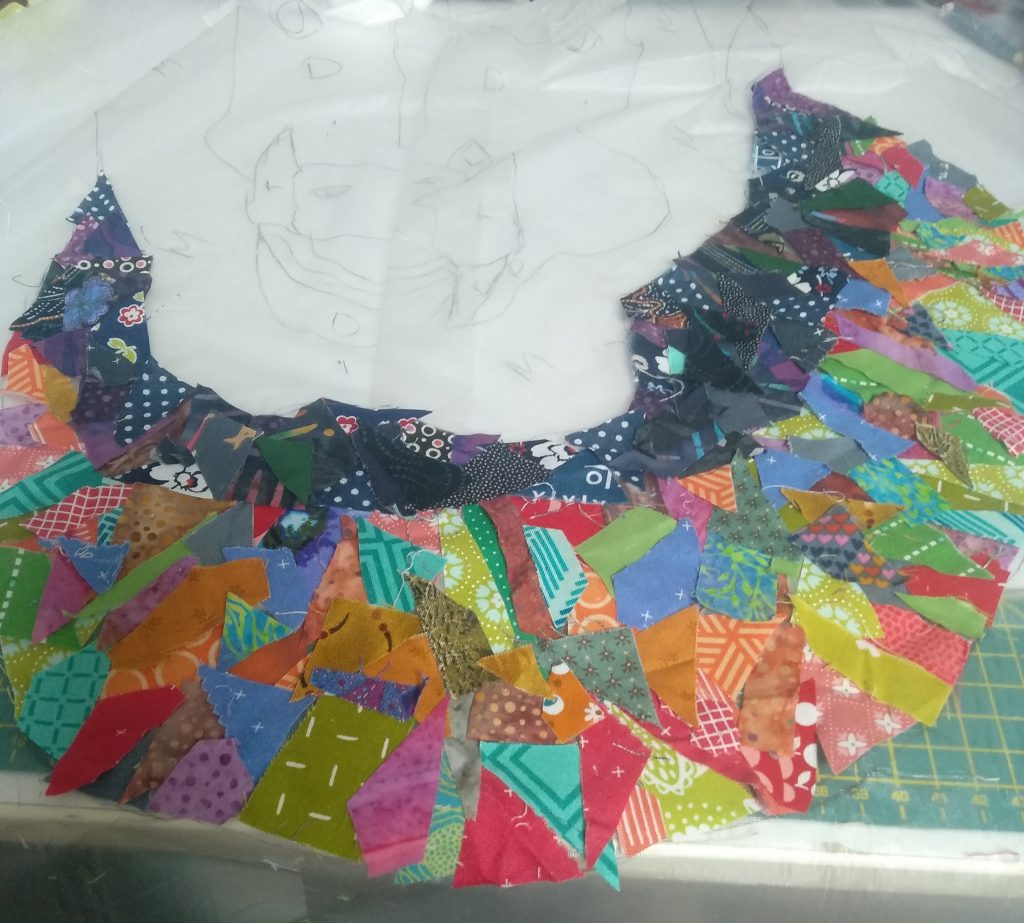
Work through the piece until it’s all filled in. To make the eyes and nostrils of the dog stand out, I take extra care to use the correct shape for the pieces. I chose to use brown for Quanna’s eyes and gave her pupils to make them stand out a bit more. If I hadn’t done that, her eyes would have been lost on the dark background. For the nostrils, I used black.
If any of the pieces seem to be a bit loose, use a glue stick to keep them in place.
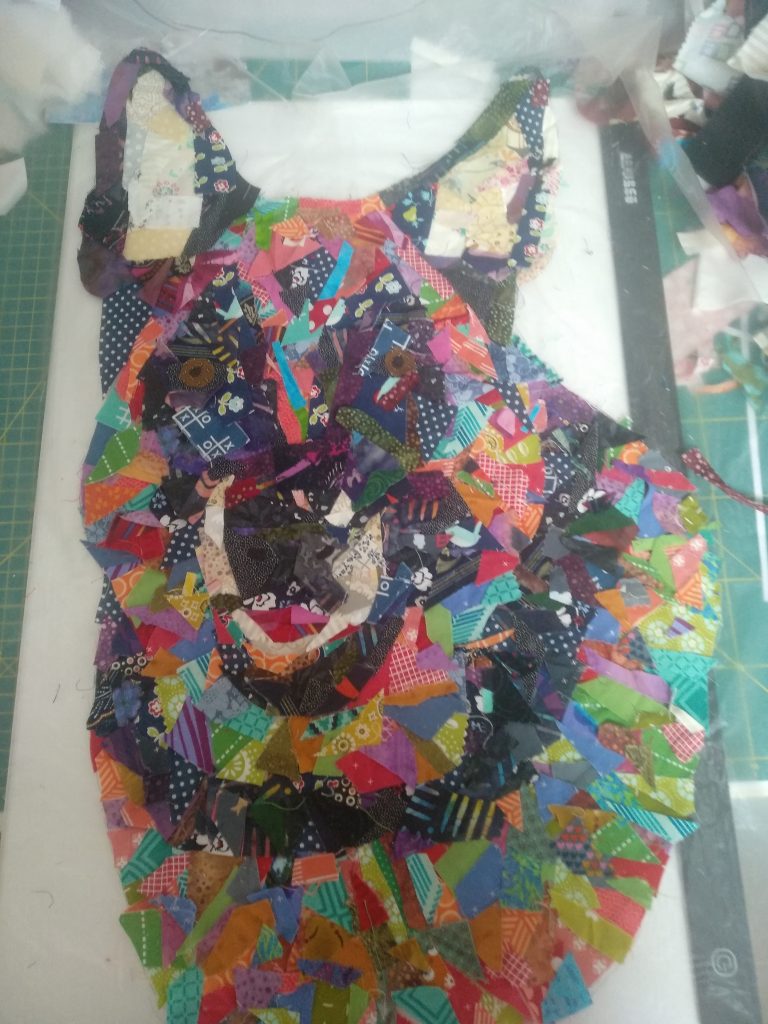
When you are happy with your collage, cut out the background of the stabilizer so that all that’s left is the piece that you are working on.
Spray baste the piece onto a background fabric and cover it with tulle. I like using black tulle. I find that it makes the colors pop, but you can use whatever color you want. It’s important to cover all these little pieces with something so that they stay in place while you quilt the work and that you don’t have any pieces sticking out.
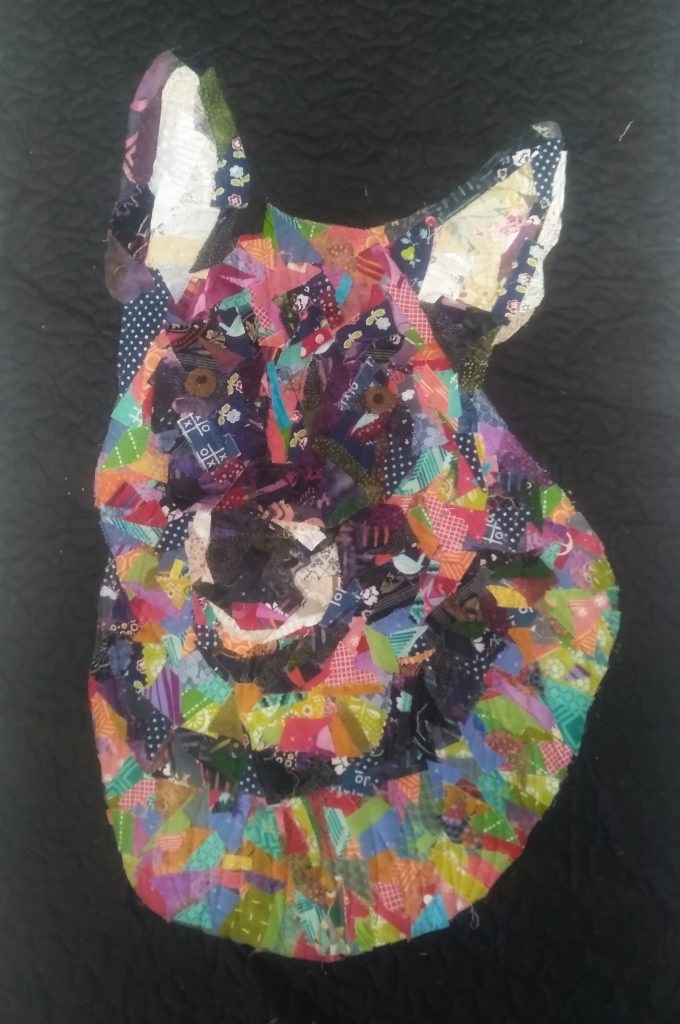
I quilted the background densely with a meander pattern. Quanna is quilted with zig-zags in the different directions of her fur. I used monofilament thread for the quilting. It’s hard to see in the photograph, but the texture stands out when you see it in person.
Square up and bind the quilt as you would any quilt.
One of the funnest things about making this quilt was revisiting fabrics that I used for other quilts. It was like a walk down memory lane. Practically each little piece brought up memories of the different quilts that I made for people over the years.
From start to finish, the whole process took me around 4 hours, not including the quilting and binding. Not too shabby for a gift my mom will love. I can’t wait to give it to her!
עברית למטה Hi Quilters! I know it’s been a really long time since I’ve posted anything. It’s been a hard, sad, scary and crazy year

עברית למטה Wow! What a year it’s been. It’s hard to believe that Rosh Hashana is here already. How exciting! There are so many things
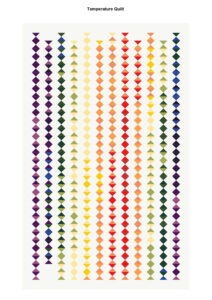
עברית למטה As the year ends and the temperature drops it’s time to think about making a temperature quilt. It’s more fun to quilt when