
Going on Vacation
עברית למטה Hi Quilters! I know it’s been a really long time since I’ve posted anything. It’s been a hard, sad, scary and crazy year


Every year the Israel Quilt Association has its annual workshop. It’s three days of quilting fun. Last year, I was only able to go for one day. This year I went to the whole thing. As my daughter likes to tell me, I went to quilting camp.
A few months ago, everyone in the association was given a fat quarter of a Hoffman batik fabric, donated by Mederia Israel. If they wanted, everyone could make a mini quilt and have it shown in the gallery at the retreat.
This is what I did with the dark brown fabric they gave me.
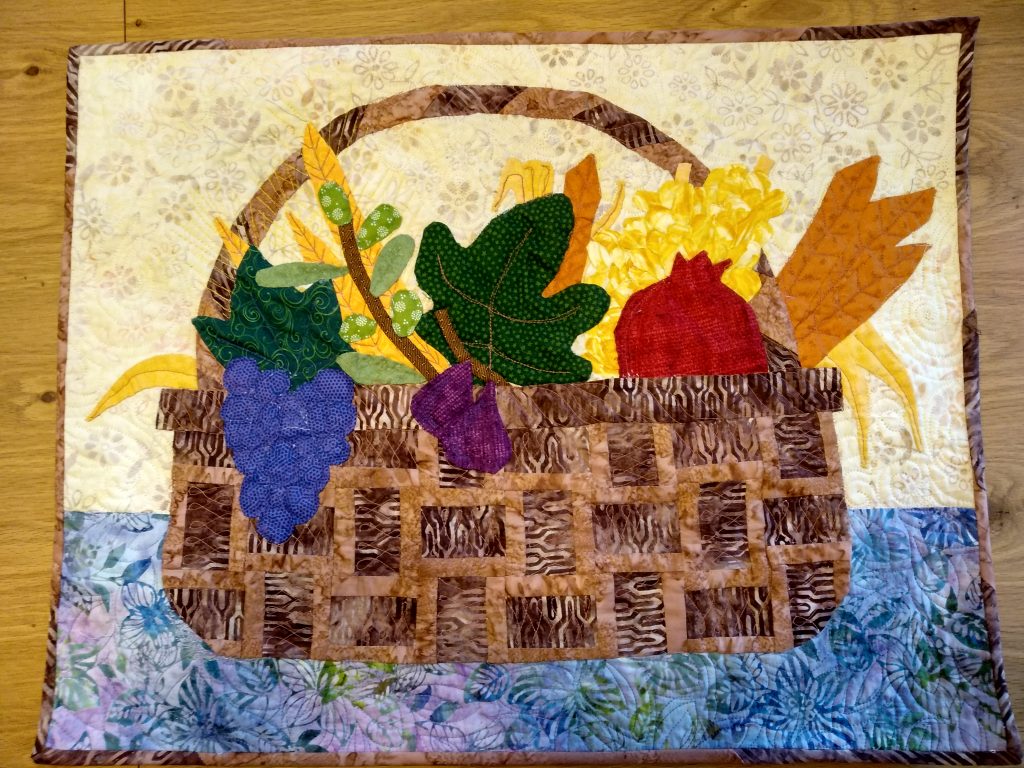
Brown fabric immediately made me think of baskets. I bordered two sides of a rectangle and sewed them together in rows to make a basket weave. I’ve wanted to make a seven species (wheat, barley, figs, grapes, dates, olives and pomegranates – seven types of produce listed in the Torah as being special to Israel) quilt for a while now. This was a perfect excuse.
Besides hanging out with other quilters, which is always fun, I was able to join two wonderful workshops.
The first day of workshops I learned how to make cathedral windows. My mother has been asking me to make a cathedral window quilt for as long as I have been quilting. My great aunt Marion was an incredible quilter that did all her work by hand. I’ve been pushing off making my mom this kind of quilt because it seemed so labor intensive.
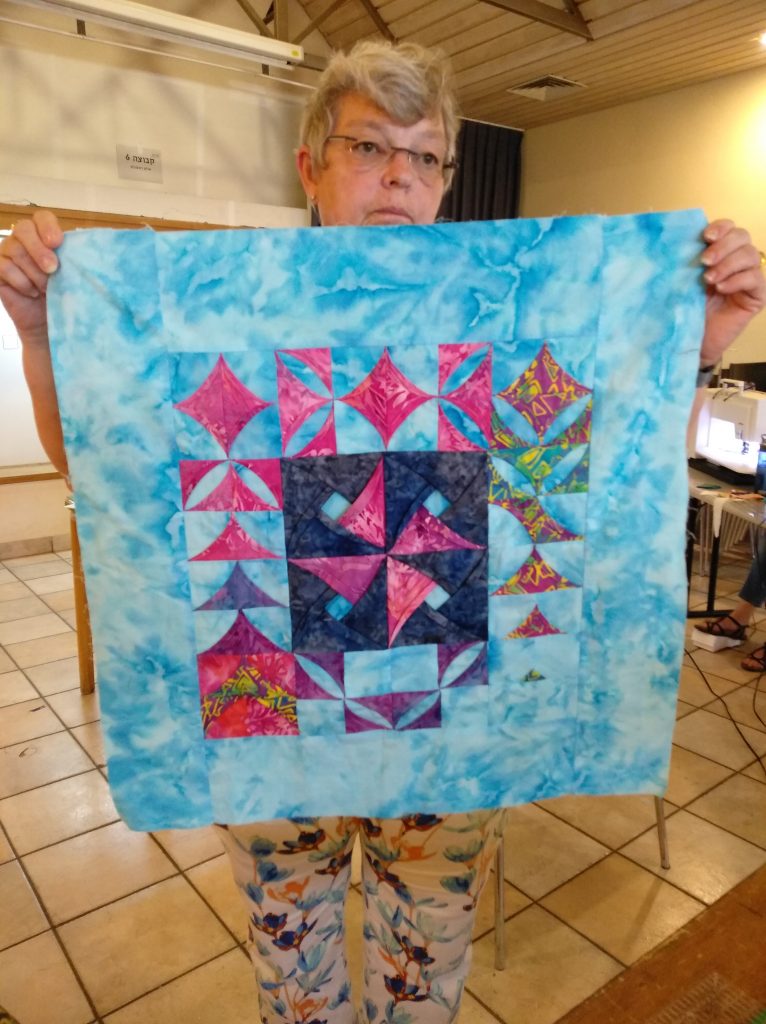
I was wrong. Mary Moody Cox (above, with a little something she made) came all the way from Hawaii to teach us a new technique for making them by machine. It was so much simpler than I ever expected. I can’t wait to get started on one. Here’s my class sample:
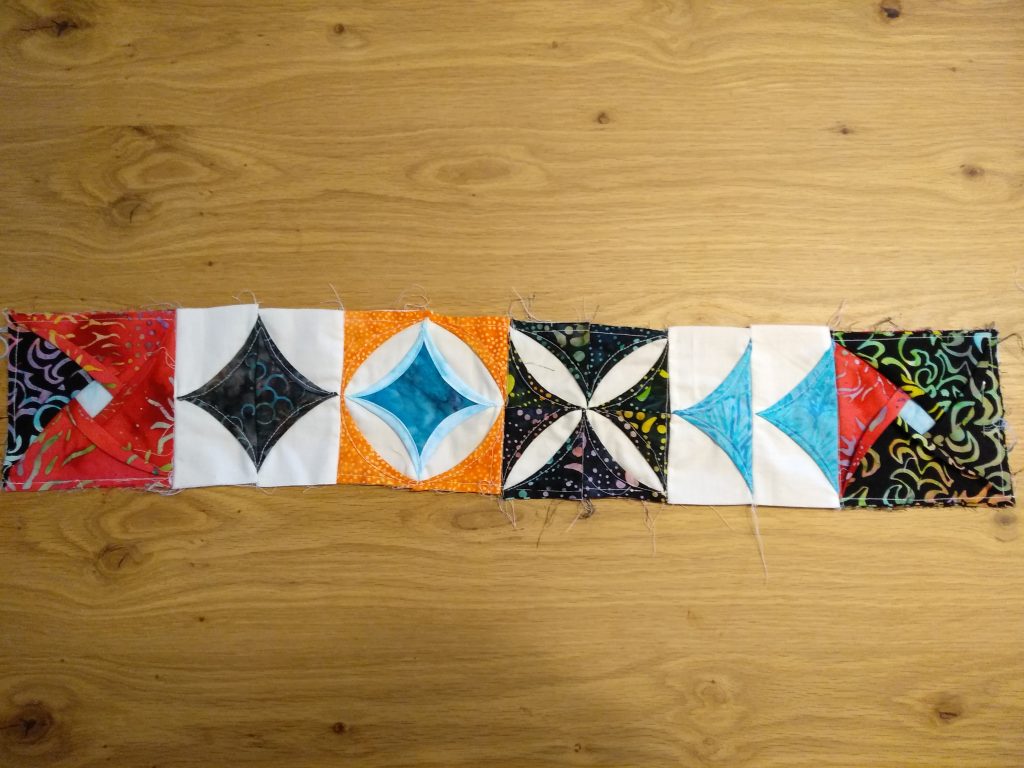
On the second day, I took a class with Roberta Sperandio about improvisational piecing curves. Roberta joined us from Venice, Italy. Being in her class was so much fun.
Technically it was a two-day class, but I only came for the second day, so I had a lot to make up on that day. Here are some things that I made.
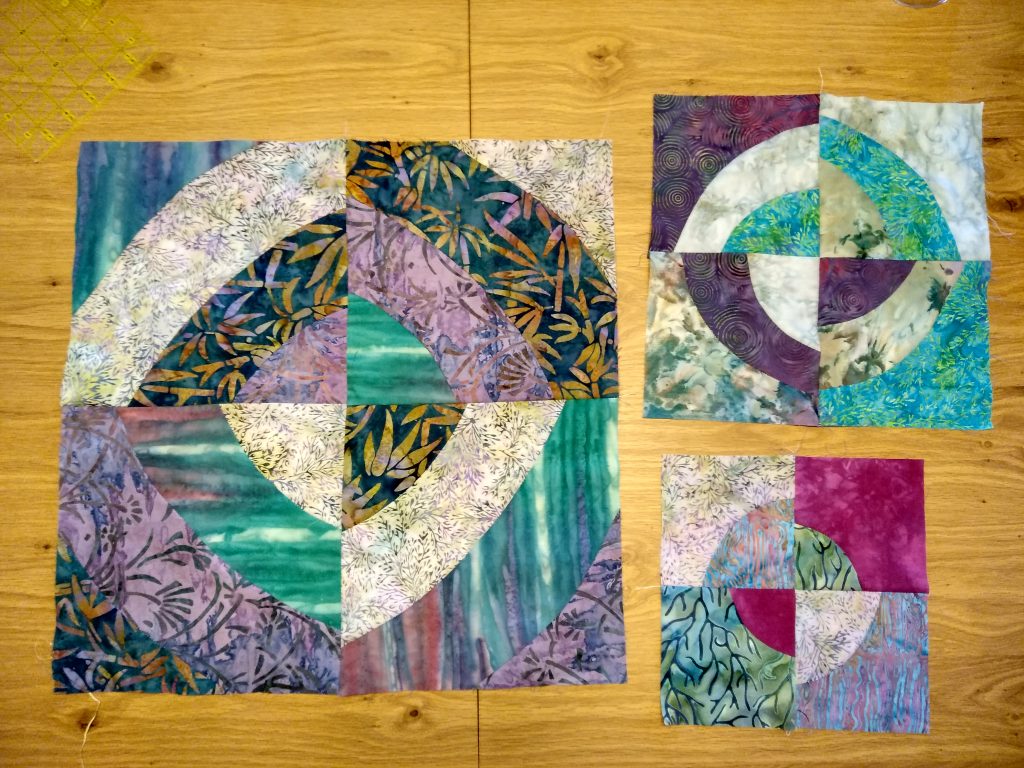
Since I came late, I was unable to finish everything that I wanted to in the class. These curves are fun, but some of the things the other women were doing were truly outstanding. I did some more of the piecing that I learning in the class when I got back home as a sort of catchup to the other women. I made and improv flower block
For this block, I cut 4 pieces of fabric 13 inches each. I layered them one over the other and started cutting. The first two cuts are arcs. The fun happens when you get to the third cut. To make the flower, cut in a wavy arc.
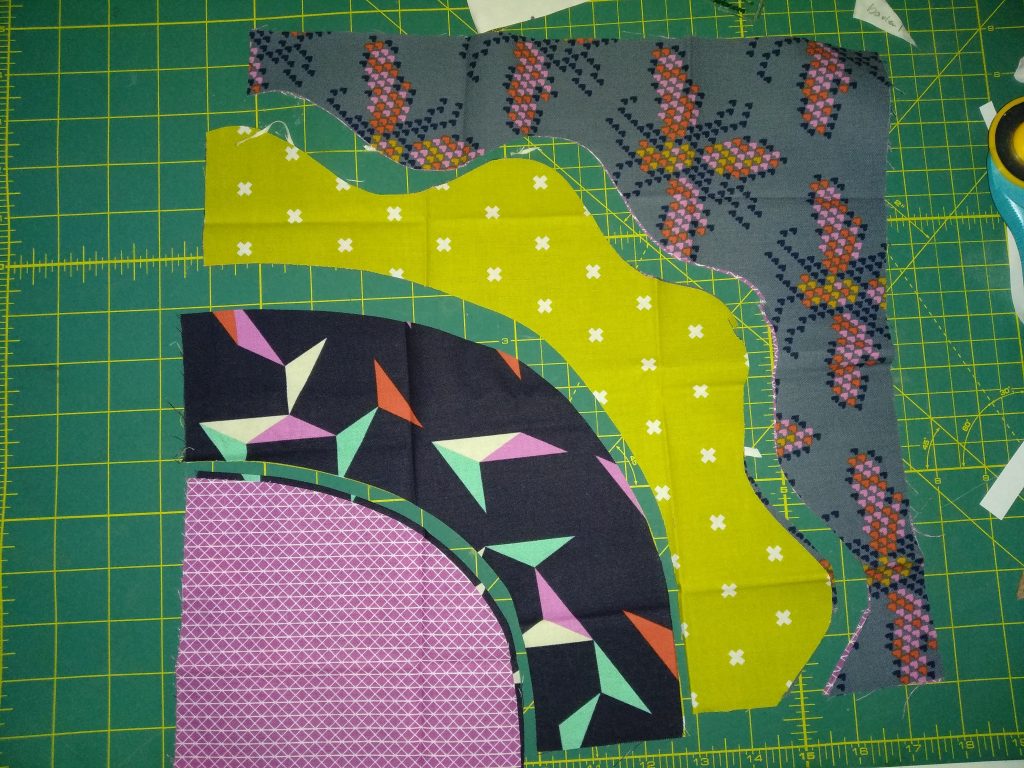
After the arcs are cut, it’s time to organize the pieces. To make sure everything is kept in order, Roberta told us to go from right to left (or left to right) and move the top fabric to the bottom for the first grouping of fabric, move the first two to the bottom of the pile for the second grouping of fabric, and move the first three to the bottom for the third grouping of fabric. You can leave the forths as is.
Roberta’s method does not use any pins. I started piecing the inner fabric about 1/4 to 1/2 inch from the edge of the outer fabric. I slowly sewed the pieces together, matching the edges as I went. After I finished the first arc, I continued down to the next one. I thought about chain piecing all first arcs, but I was afraid that I would mess up the order of the fabrics. Better safe than sorry.
Things started getting wonky while I was sewing, but it was OK. I made sure that my needle was in the down position, lifted the presser foot, and smoothed it out. The very curvy area was much harder than the plain arcs. I had to take it slowly. There were a lot of starts and stops as I went around it.
After all the blocks were sewn up, I pressed each block with Best Press, a starch alternative. I don’t usually use starch for piecing, only for applique, but this really needed it. Since everything is sewn on the bias, the curves stretched into shape. I started pressing from the bottom, from the center out. I then pressed from the top of the block, making sure to get into the seam line so there wouldn’t be any creases.
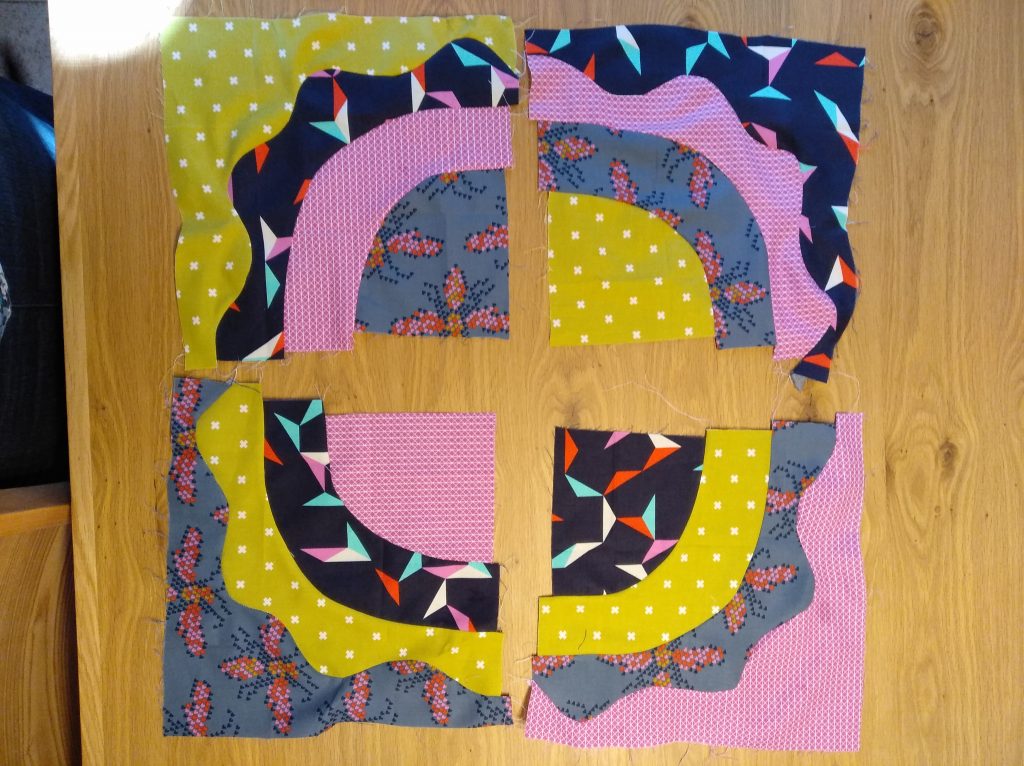
The next step was to square them up. First I squared them from the inner curve edge that gave me a right angle to line up with. After that, I measured all the blocks to see which one was the smallest. The original 13-inch square squared up to 11 inches. Not bad when you consider the seam allowance.
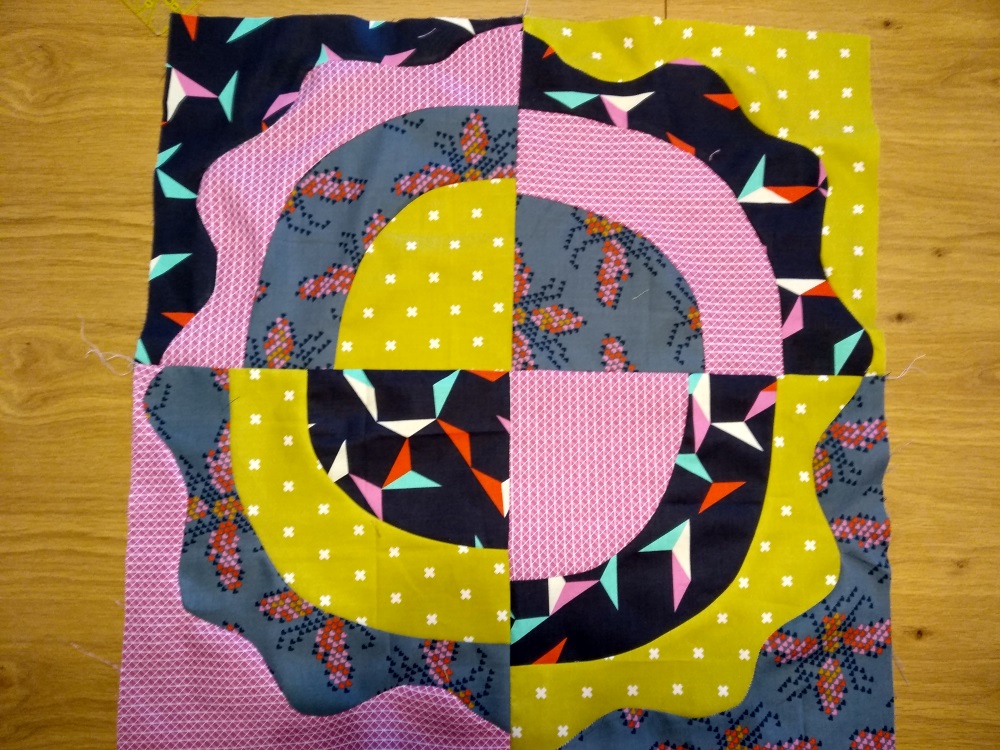
I connected the four patch the same way that I would connect any four patch block. Roberta says that the piecing may improvisational, but that doesn’t mean that there are no rules. A four patch is still a four patch. By following some rules it keeps the quilt from looking like a hot mess.
The finished block came out to 21 1/2 inches. I’m going to make a couch pillow out of it for my daughter-in-law. She saw the original circles that I made and was really into them. I hope that she likes this one too.
I want to say thank you to everyone on the organized the workshop. Everything was amazing. I can’t wait to see what they have in store for the rest of the year and next year’s workshops!
עברית למטה Hi Quilters! I know it’s been a really long time since I’ve posted anything. It’s been a hard, sad, scary and crazy year

עברית למטה Wow! What a year it’s been. It’s hard to believe that Rosh Hashana is here already. How exciting! There are so many things
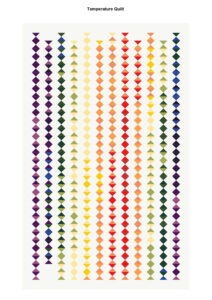
עברית למטה As the year ends and the temperature drops it’s time to think about making a temperature quilt. It’s more fun to quilt when