
Going on Vacation
עברית למטה Hi Quilters! I know it’s been a really long time since I’ve posted anything. It’s been a hard, sad, scary and crazy year


Finally! We get to play with fabric! I don’t know about you, but one of the things that I love most about quilting is fondling fabric. We have finally gotten to the point where we pick out and sew fabric!
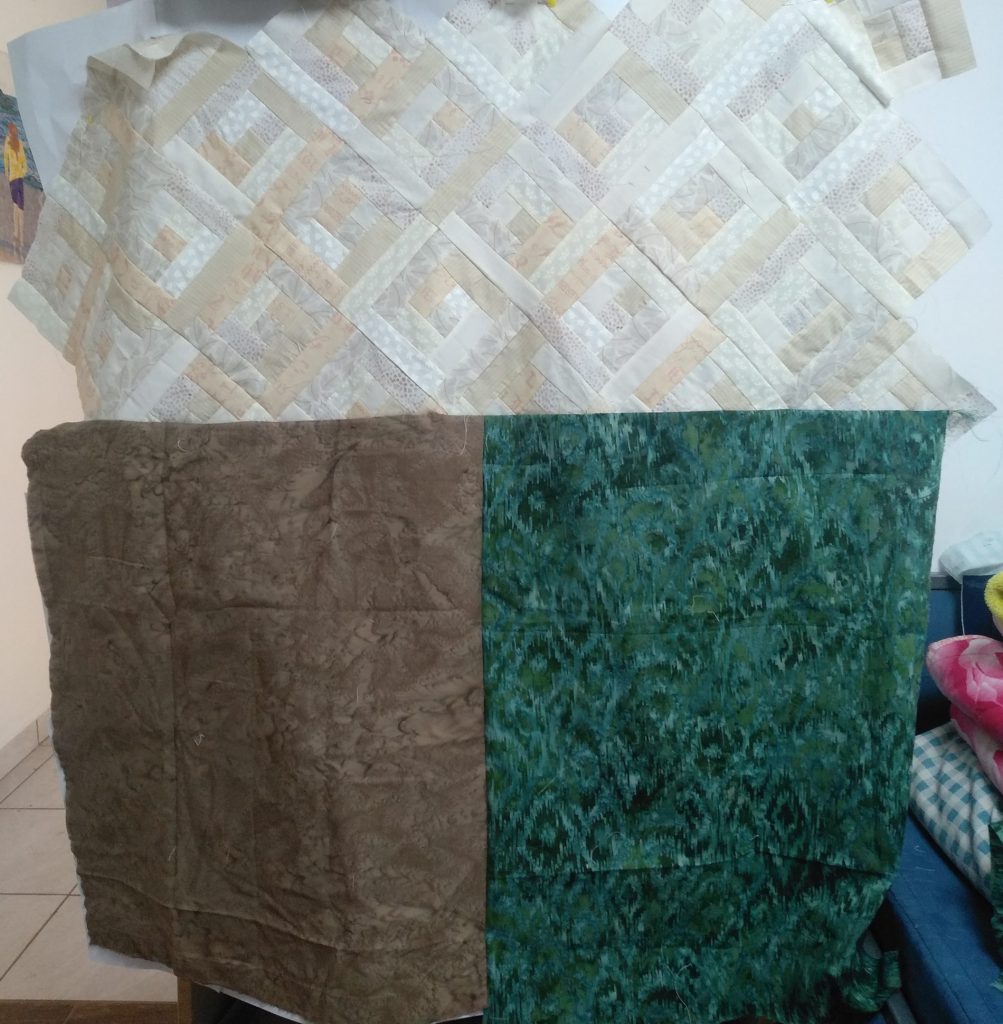
I work on my art quilts in layers. I start at the back and I build up the layers. Let’s analyze the back of the quilt.
There’s a lot of stuff that’s going on in the background of this picture that distracts from my beautiful granddaughter. I really don’t need anyone to see the rabbit’s cage or my son’s big feet. It’s my quilt and my art, and I get to show what I want.
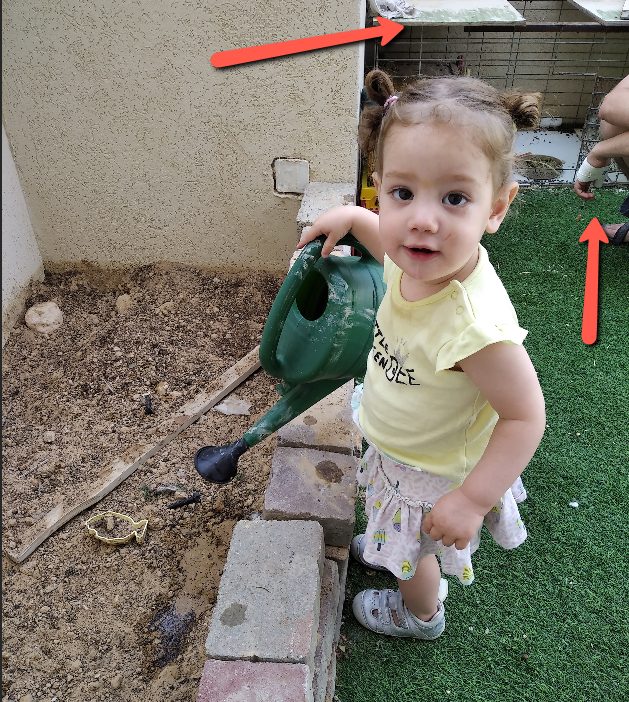
I decided that instead of making a bend in the wall, just make it straight. The bend adds nothing to the composition. My son is wonderful, but he’s got to go, as does the rabbit cage.
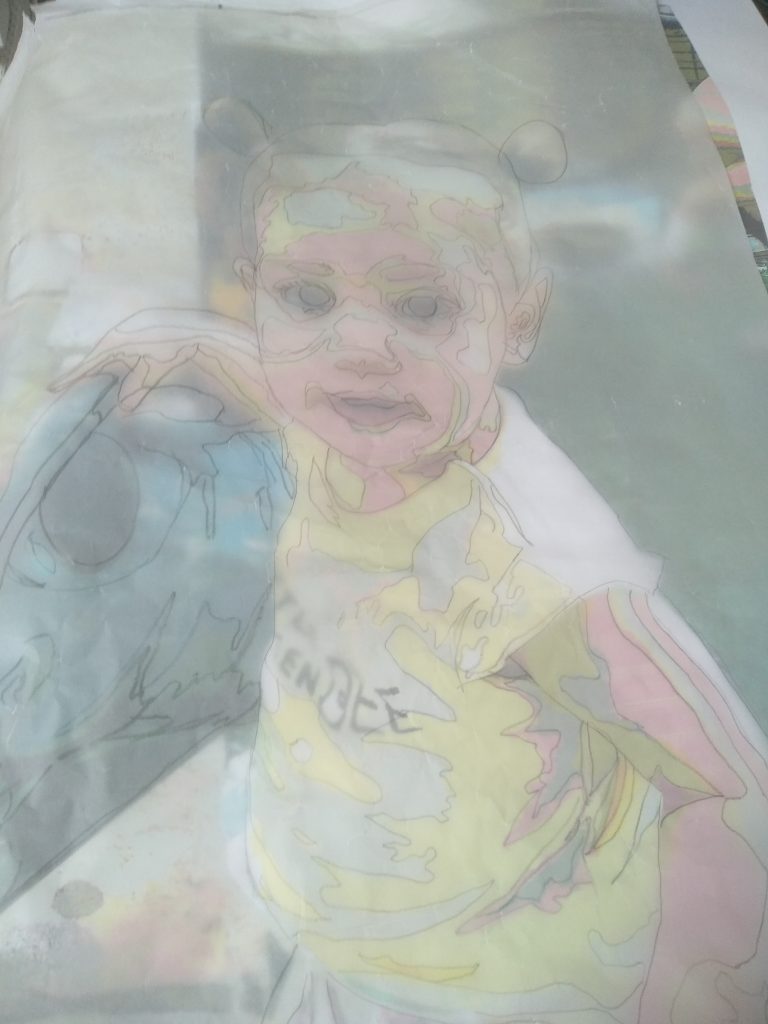
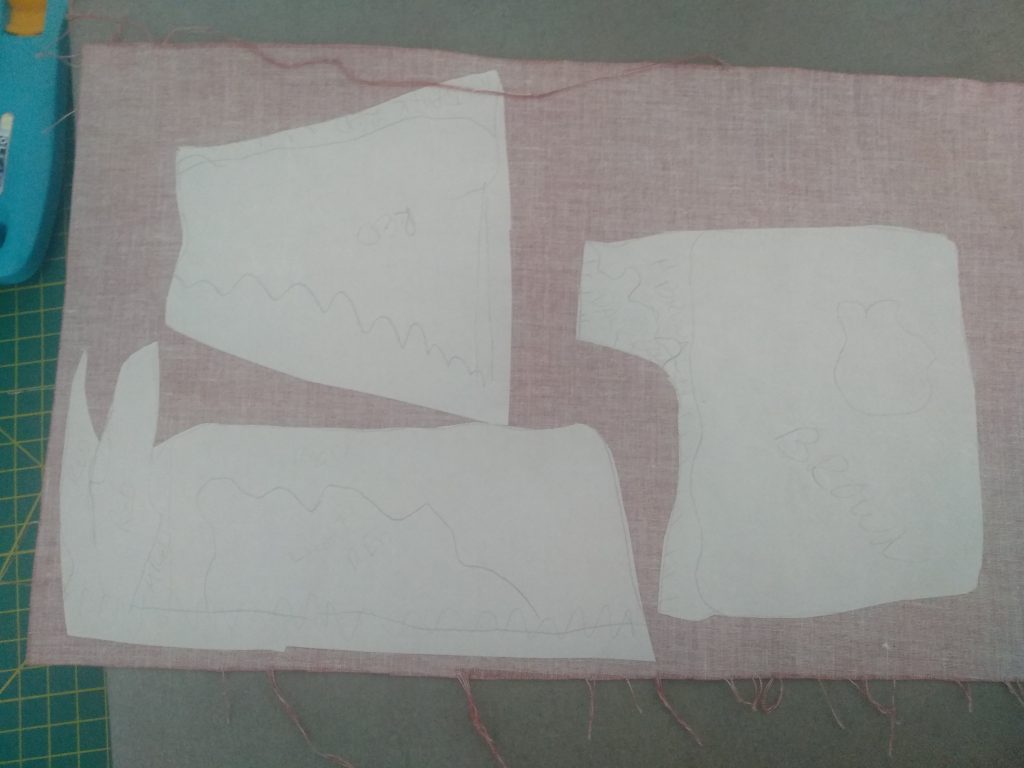
I know I promised you fabric, but now we need to trace out on tracing paper sheets where everything goes. Take the full size printed posterized image to light box or other light source. Tape it down on the printout so that it won’t move while you trace it, and trace out all the lines. Since I’m not following the wall 100%, I followed the line for the wall all the way through, and decided that I was going to separate this background into 3 quadrants for easier sewing – wall, grass and dirt.
An important thing to keep in mind when you are picking fabrics – use the original photo for the colors. DO NOT use your posterized version. When I started out I just went with the posterized version of the colors and it was not a pretty picture. (Not to say you can’t – it’s your art and if you want to use different colors, go for it!)
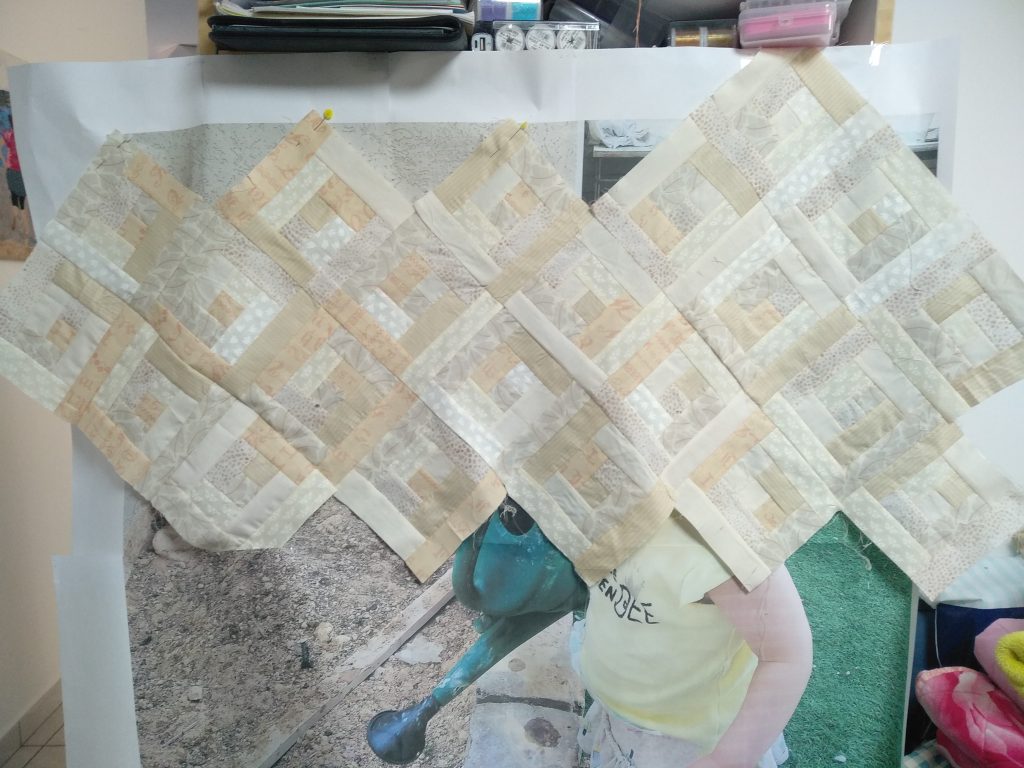
The wall is pretty boring by itself. I could have used a textured piece of fabric to mimic the texture of the wall, but I opted to make it more quilty. The color is obviously cream, and I didn’t feel like I needed to deviate from it.
I’ve never actually made a log cabin quilt, but I’ve always liked the texture it gives. Cindy Richard suggested using log cabins blocks, and I ran with it. What you see here are random pieces of cream fabric that I cut into one-inch strips and sewed together. I measured out the height and the width of the wall area before I pieced it together to make sure that I created enough log cabin squares. I thought sewing them together on-point would be a bit more fun and add a bit more texture. When I organized them into rows, I put the lighter ones on the right side and progressively got darker. If you look at the picture, you can tell that the light source is coming from the right and I wanted to mimic that.
I’ve done grass before with strips, but in this case, I was happy to let it fade into the background (literally). There is a pattern on the the fabric, and I made sure to use it so that fabric gives a vertical impression.
For the dirt area, I chose dirt colored fabric. I measured out the width and height of the grass and the dirt and added a few inches on each side and sewed them together. I never work on the exact size when I’m making the background. I look at it as the canvas for the rest of the quilt. It will be easier to square it up with extra fabric than to try to figure out how to enlarge the background if it falls a bit short.
Next, I attached the wall to the floor, making sure that the center seam will be covered by the bricks.
The line between the dirt and the wall is too harsh, so I added some green to soften it up a bit.
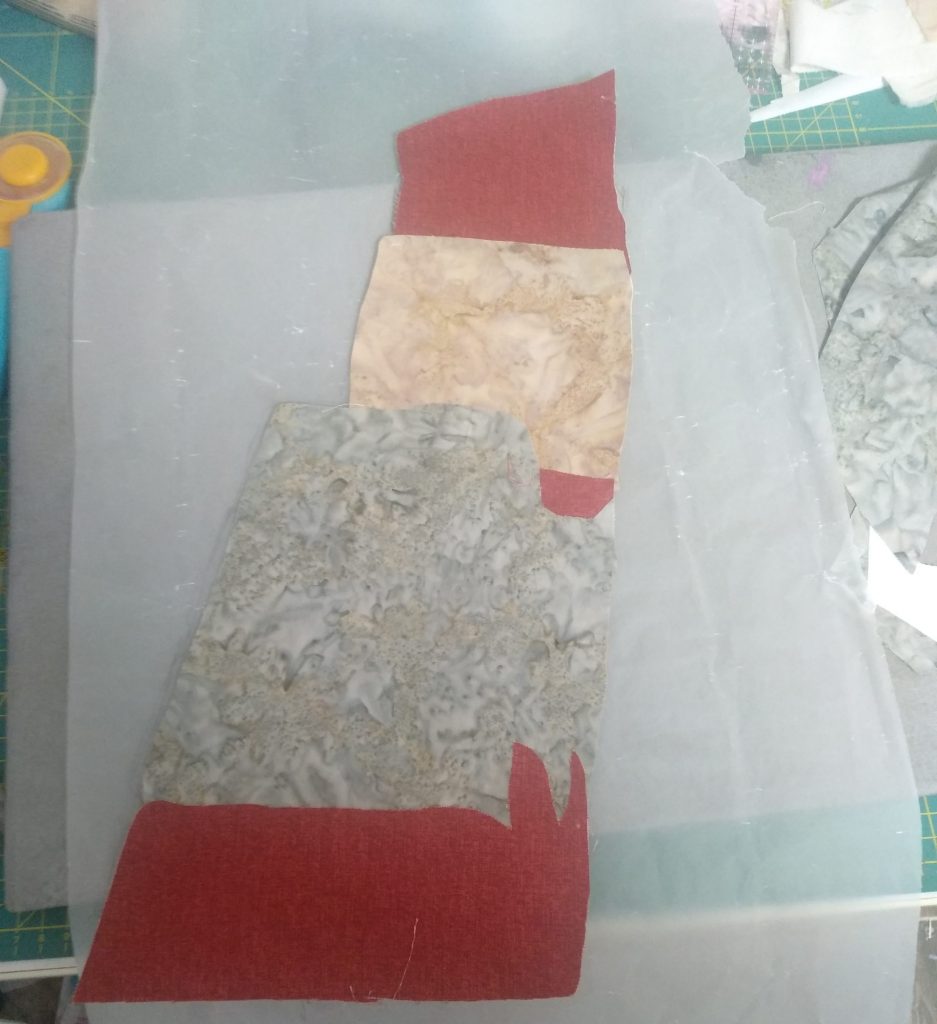
Next are the bricks. This is where we have more fun with fabric. I like strong colors. The bricks on the picture are a bit washed out. I know that the bricks are red, brown, and grey, so I chose the red, brown, and grey that I wanted to use. Instead of pale, I went for bold.
Place the tracing paper upside down so that it is a mirror image of what you traced on the lightbox and trace it onto fusible web. This fusible web will be attached to the back of the fabric that you will be using, so we need the image in reverse.
There are shadows on the bricks. There are a couple of ways to deal with that. You can either choose to use different fabrics or you can layer tulle over the main fabric to make it darker or lighter. If you want it darker, use a dark color like black tulle. If you want it lighter, use a light color, like white. This is important to figure out before you cut fabric. In this case, I went with tulle. That means that when I cut my fabric, I’m going to just use 3 different fabrics for the 3 different color bricks.
I can’t mention the word tulle without mentioning Cindy again. She is the queen of tulle and that brilliant idea comes from her.
Cut out the pieces from the fusible and attach them to your fabric. Then cut out the fabric. Cut some of the pieces a bit bigger than others to allow for overlap of the fabrics. I’ll cover more about that in a future blog post.
Use the tracing paper to help you place the pieces correctly on the rest of the background. If you are using tulle, layer it in the correct places. Note: to get a darker or lighter effect, you may need to use more than one layer of tulle. Pin everything in place.
At this point, I could have said that the background was done, but it’s a pity to just put dirt on the left of the quilt. There are so many pretty colors, and I decided I was going to make the quilt the way that I thought my kid’s garden should be instead of how it is now.
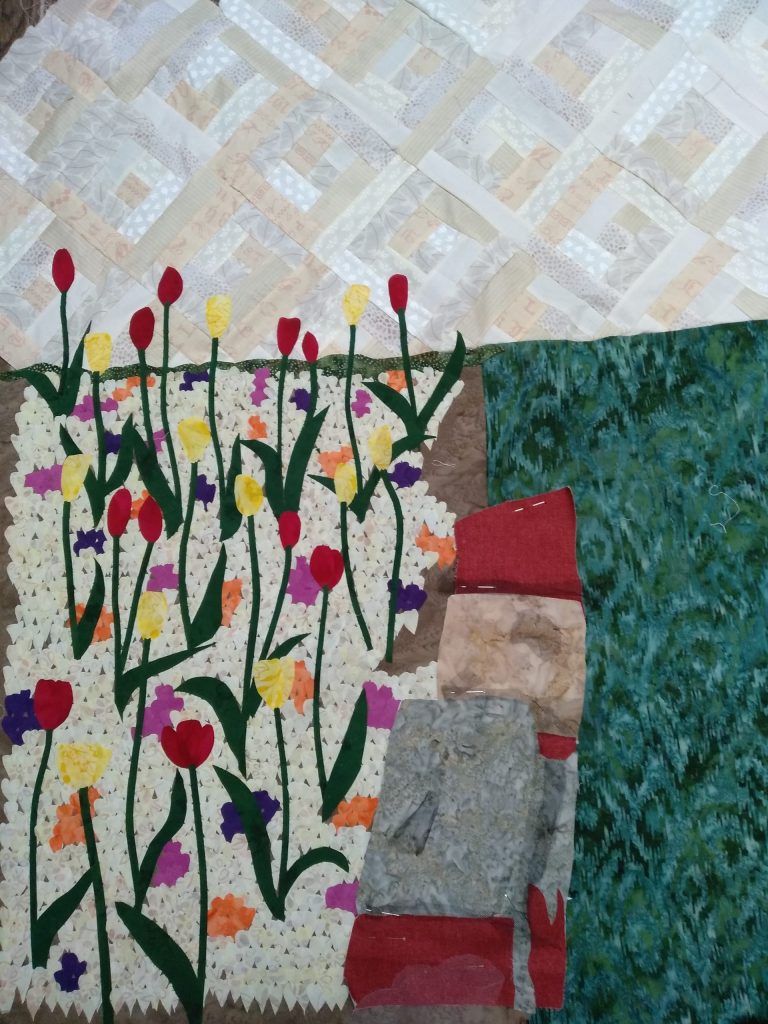
I love tulips. I used an image of tulips to get inspiration for how I thought I might want it to look. Then I went crazy with cutting out different shapes. I did not measure anything. I put a piece of Heat n Bond light fusible web on the back of my fabrics and went to town. Out of the dark green, I cut leaves and stems. Out of the red and yellow, I cut tulip leaves. Out of the pale yellow, purple, orange, and pink, I cut different size heart shapes.
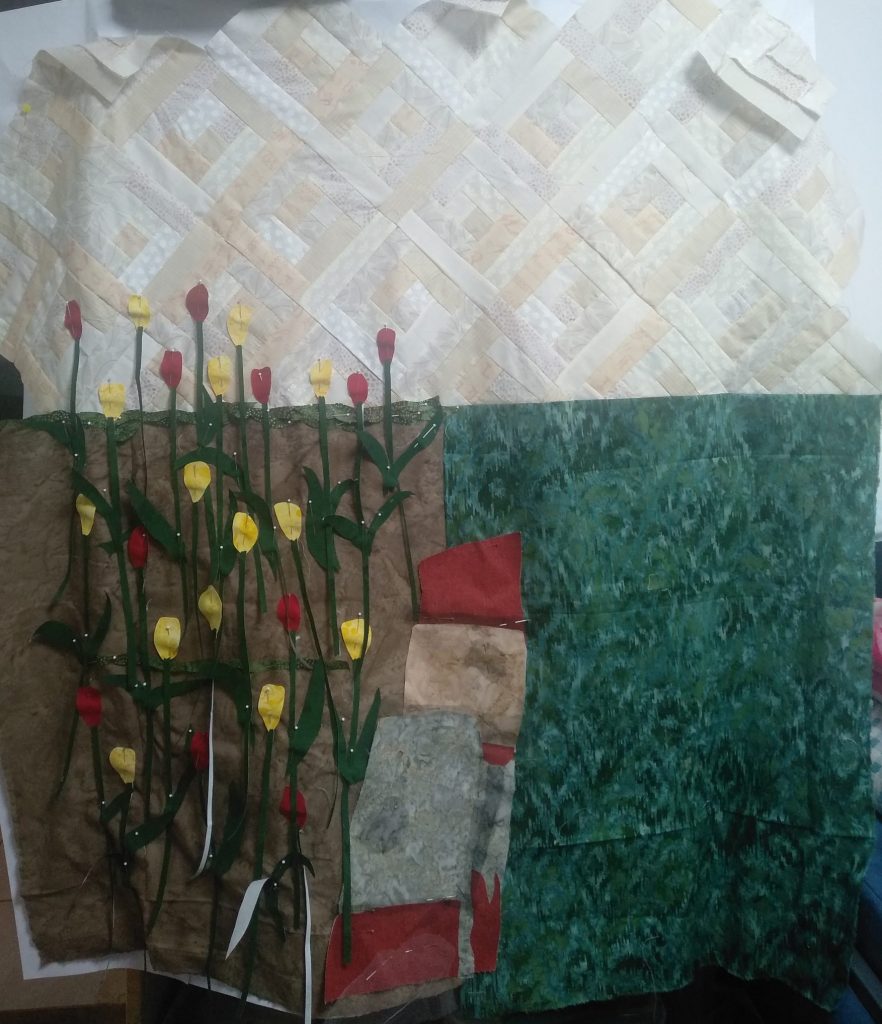
I attached the tulips to their stems and pined them on in random areas. I put the smaller tulips further in the back and the larger ones closer to the front. When I had them about where I wanted them, I added the leaves. I gave a bit of a curve to the stems to make them a bit more lifelike. I probably should have done this first, but then I layered the little heart-shaped flowers from the back to the front, squeezing them in where they needed to go. It’s hard to tell, but I used smaller flowers in the background and they increase in size as it moves to the foreground. I didn’t place them too close together – I wanted some of the brown dirt to show through. I have no idea how may flowers I placed on there, but I know it’s a lot.
Even though the flowers had fusible on the back, I glued them in place as I went. I just wanted to make sure that I was happy with how it was coming out before I made the commitment to fusing it down. Once I was happy with it, out came the iron. Do not try to iron tulle. It will melt and make a mess of your iron. Remove it, fuse what you want to fuse, and then pin it back on. We are going to quilt it down and it will be held in place as the next step in the process.
Note: The big brown patch next to the bricks will be covered by the watering can, so there was no need to add more flowers there – this is not a mistake.
The fabric part of the background is now complete! If you have any questions, please feel free to contact me. Happy quilting!
עברית למטה Hi Quilters! I know it’s been a really long time since I’ve posted anything. It’s been a hard, sad, scary and crazy year

עברית למטה Wow! What a year it’s been. It’s hard to believe that Rosh Hashana is here already. How exciting! There are so many things
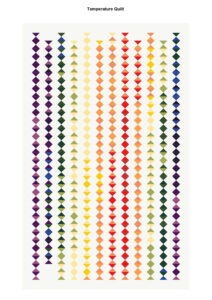
עברית למטה As the year ends and the temperature drops it’s time to think about making a temperature quilt. It’s more fun to quilt when