
Going on Vacation
עברית למטה Hi Quilters! I know it’s been a really long time since I’ve posted anything. It’s been a hard, sad, scary and crazy year


Now for the main event! The background has been completed. Now it’s time to put our portrait together. This is the part I like to think of as fabric puzzling. You will understand what I mean in a bit.
Before we get to the nitty-gritty of putting the pieces together, let’s start with picking out fabric. My granddaughter looks pretty pale in this photo. I didn’t want her to just fade into the very light background. I chose to go with a hew of flesh tone colors that still looked natural, but that gave some extra pink to her cheeks.
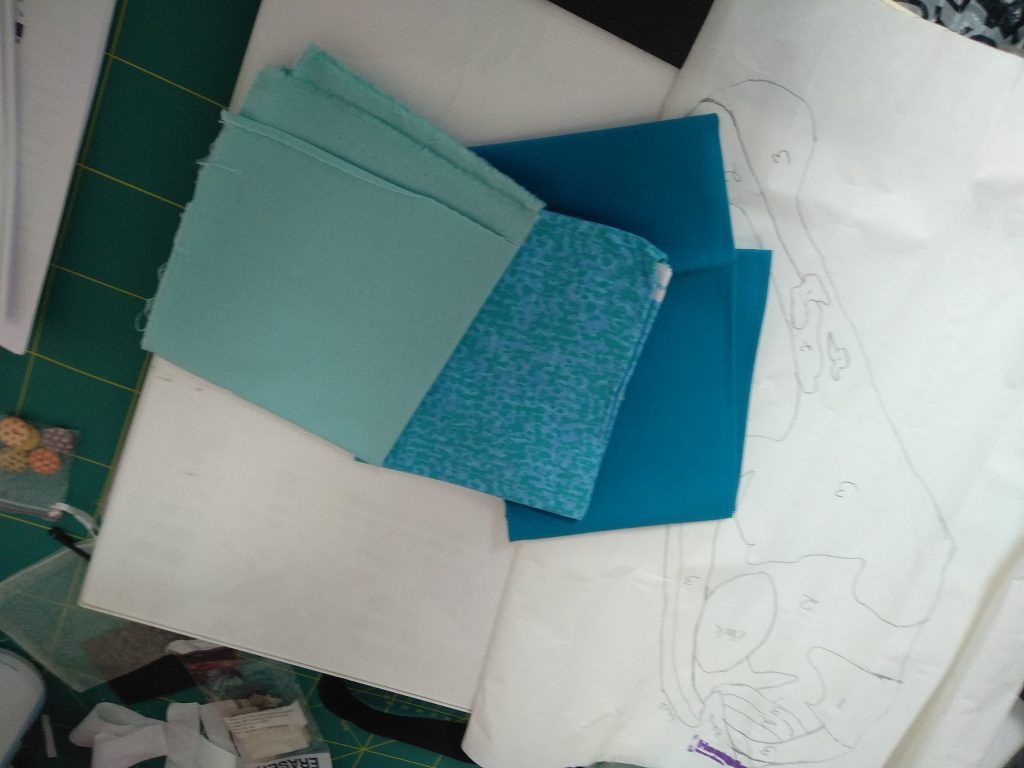
When we posterized the image, we decided to work with 3 levels of posterization. That means working with fabric that is in the same color family but using 3 different tones.
Take each part of the image and find the fabric families you need to make the different parts of the image. In this example I have:
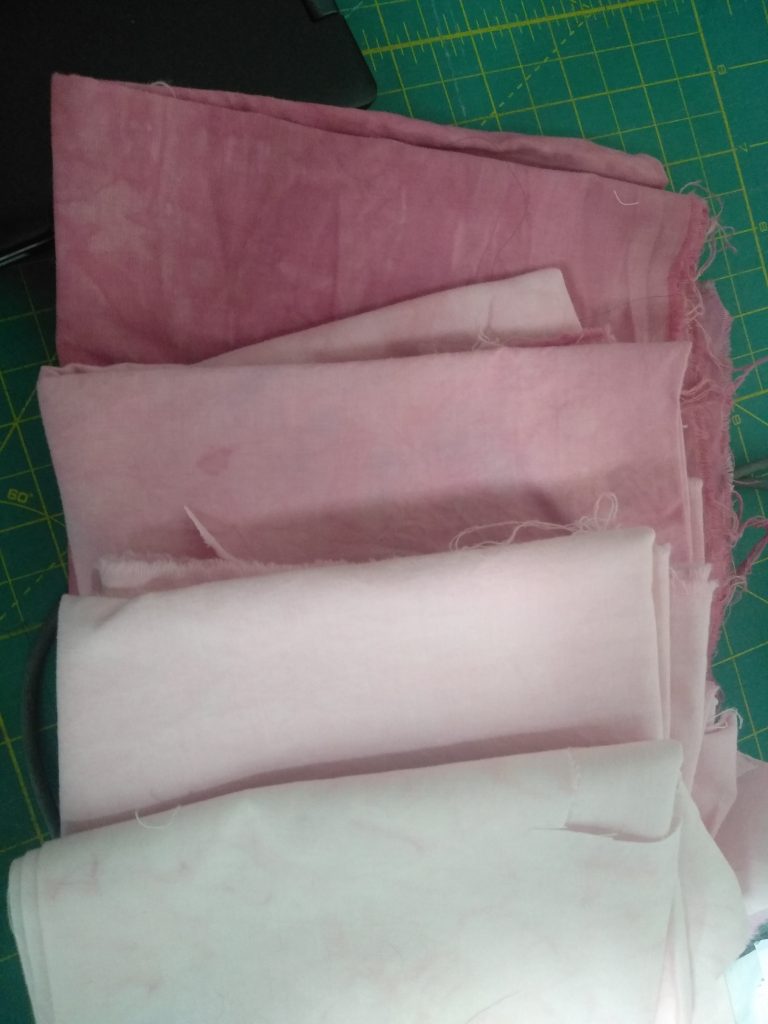
I often find it difficult to choose fabric for the skin. This time I had it all ready. I’ve been learning to dye fabrics with Josepha Himmel. She’s an amazing woman and an amazing quilter, and just an all-around good person.
If you don’t have a Josepha in your life and you are looking to make a more realistic type of portrait, I suggest using solid batik fabric, or something similar. What I like about using batiks is that they look natural and give a few shades of a color, which makes it more interesting. They have a sort of marbleized effect that works well. Small prints also work well if you want to go funkier.
To make sure that there is enough contrast between the shades there are a couple of things that you can do.
What we are trying to do is remove distractions and only see the tones. They both work, but it’s easier to rely on the picture method.
For the watering can, I chose to switch the green watering can to turquoise, I went with red instead of yellow for the shirt, blueish denim for the skirt, and tan for the shoes. I chose colors that I liked better than the originals and that popped in the picture.
Fabric has two sides. You are allowed to use both. As you can see here in Shaked’s shirt and skirt, I used both sides. It gives a great light and shadow effect. You pay for both sides, you might as well use them.
Now comes the fun part – fabric puzzling!
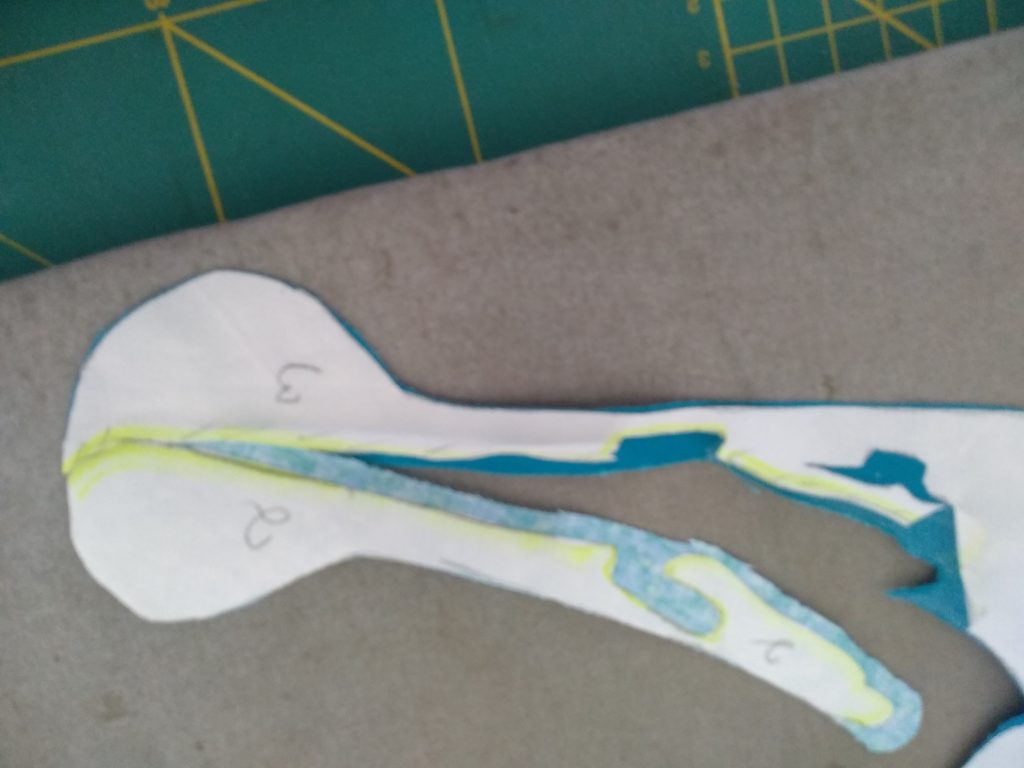
Look at the traced image and the real picture. Mark the color areas from lightest to darkest (in my case 1-3, 1 being the lightest and 3 being the darkest). Copy the outline on to fusible web (I use Heat and Bond Lite). Turn the tracing paper so it is a mirror reflection of the image. Place it on a lightbox and copy the full image on the paper side of the web.
In some cases you may need to go more than the number of layers of color that you see. There are two options – use tulle to darken it, like I mentioned in making the background, or just use darker fabric. You can see that I had to do that on her fingers. 3 is a guideline not a hard and fast rule.

For each area, number the image from lightest to darkest by copying over the number from the traced image. Take a highlighter marker and mark on the lighter side of each section. For instance, if a section 1 touches a section 2, highlight the side of the section 1. I’ll explain why this is important in a bit. (Make sure to see the note below on highlighting before you do your own.)
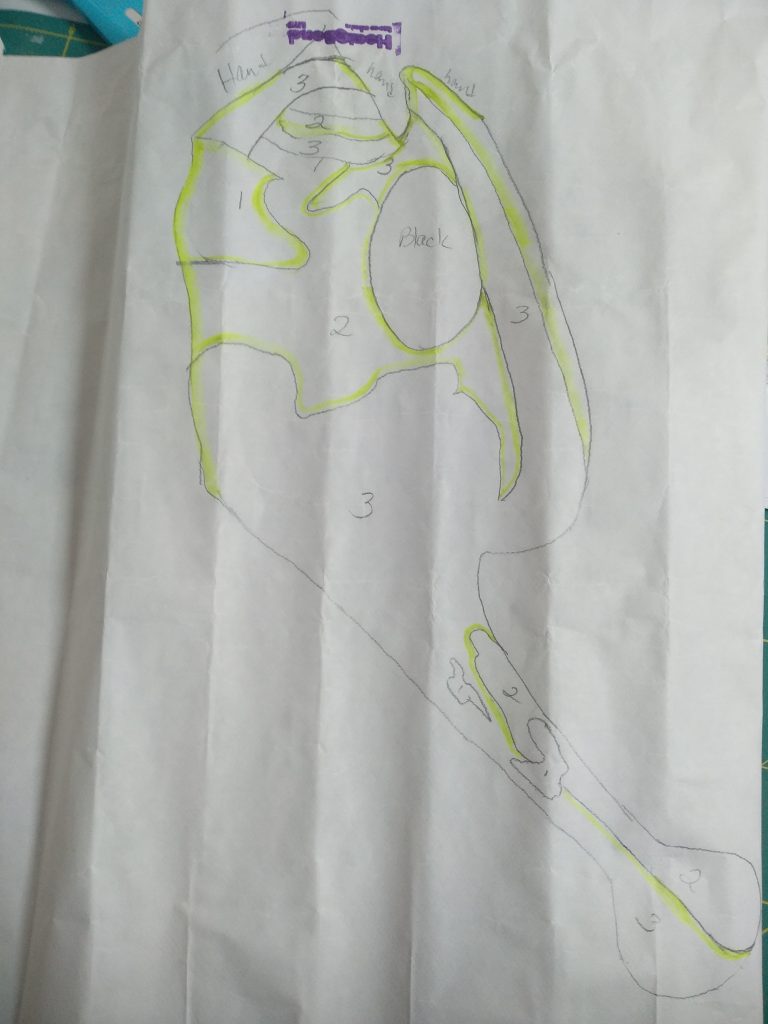
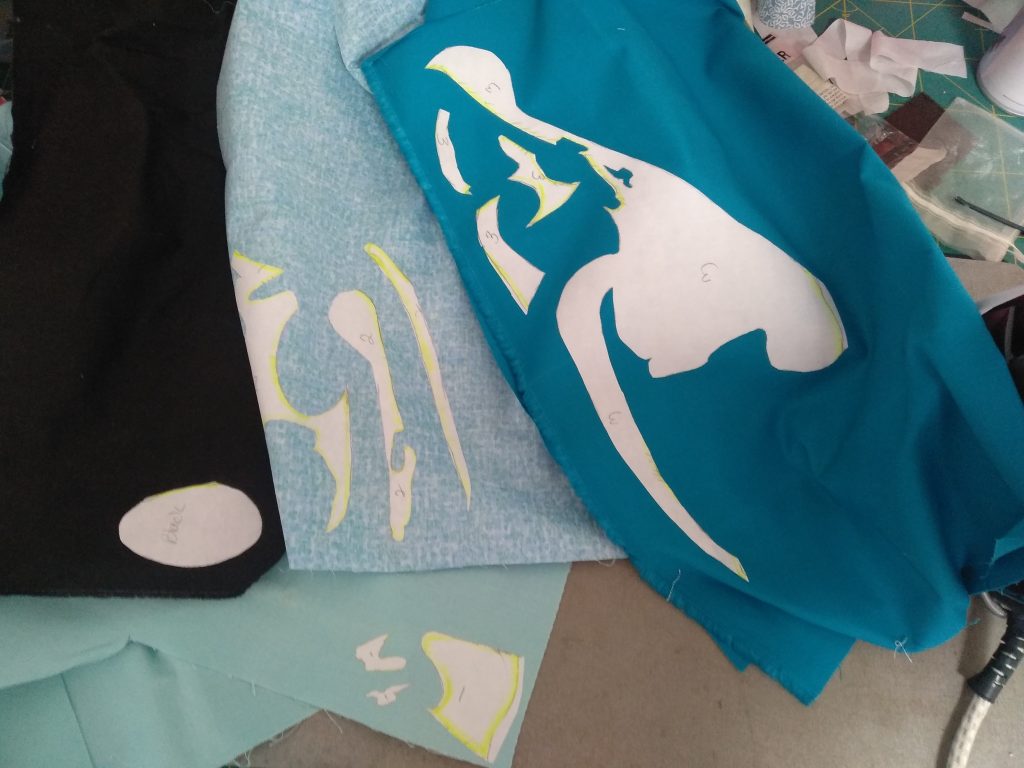
Cut out the main pieces. For this quilt, that would be the watering can, head, arms, legs, shirt, skirt, and shoes. Do not separate them into smaller sections yet. Once that’s done, it’s time to tackle each individual section.
We’ll start with the easiest piece – the watering can. I cut out the pieces of the watering can and fused them to the appropriate color. I left a little bit of space between each piece. This is where you need to pay attention to the highlighter marker that we added. When I’m cutting the fabric pieces out, I leave about a quarter of an inch of fabric where it’s highlighted. Where there is no highlight, I cut to the exact shape.
It’s really important to have the extra fabric. Overlap makes sure that there are no holes when you put it together. If you cut it straight without leaving extra fabric, try to place the fabrics as close together as possible. If you don’t, you can still cover up any spaces with stitching, but this is less ideal. You can also place a small piece of fabric underneath to hold it together, or cut a new piece of the puzzle. (I’m sure you’ll never guess how I know this.)
After all the pieces are cut out, it’s time to assemble them into a puzzle. I don’t take off the paper on the back of the fabric, but I peal it back a bit where the lines are solid and they join to another piece of fabric. I then slide the excess part of the piece so that the parts line up like a puzzle. When they fit together, I will add heat to fuse them together. I still leave the rest of the paper on the back.
If you have a lot of pieces and you’re not sure how they all go together, you can use your tracing paper as a guide.
Work on putting it all together, adding each section to each other. Do it the same way that you did the individual pieces.
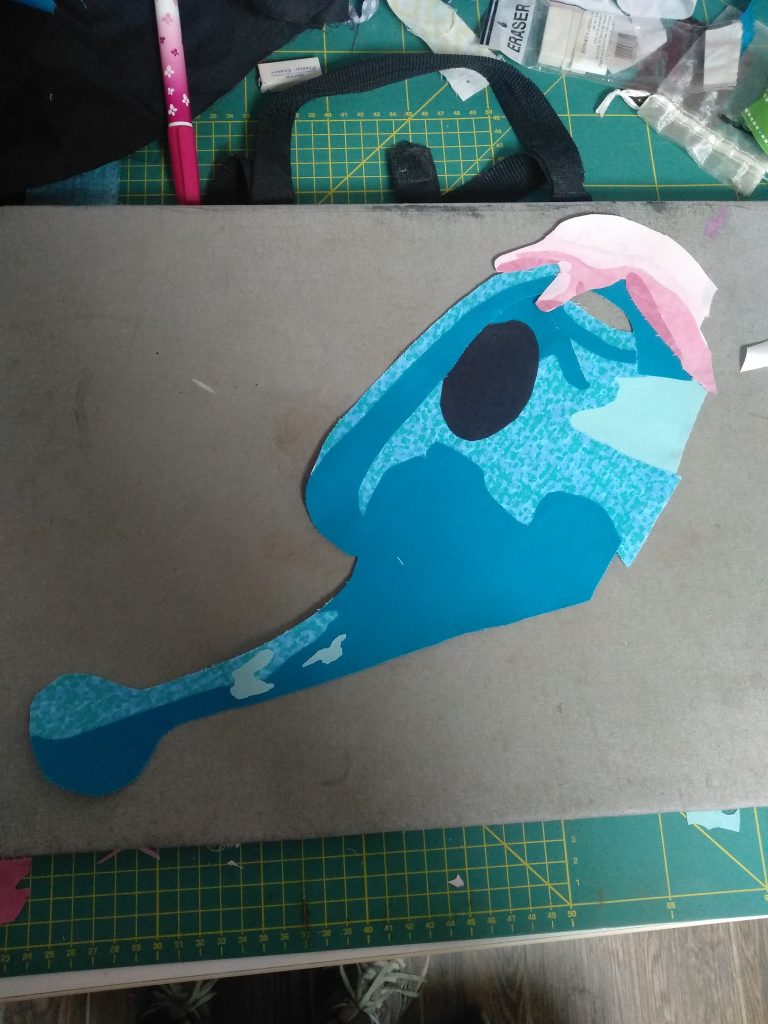
Note: In general, when highlighting, I try to put the lighter color under the darker color so that there is less chance of seeing the darker fabric through the lighter one. Sometimes in the picture, this just makes sense. There is a little extra light on the watering can spout. Instead of trying to sneak the lighter shade in the darker one, it just made sense to put the lighter one on top.
There are also times when you won’t cut the fabric but will cut the fusible web. For instance, my granddaughter’s eyebrows are on her brow, right where they belong. Even though I cut out the fusible to put on the fabric, I didn’t bother cutting the skin-colored fabric at all. I used a lightbox to help place the eyebrows where they belong and then ironed them in place.
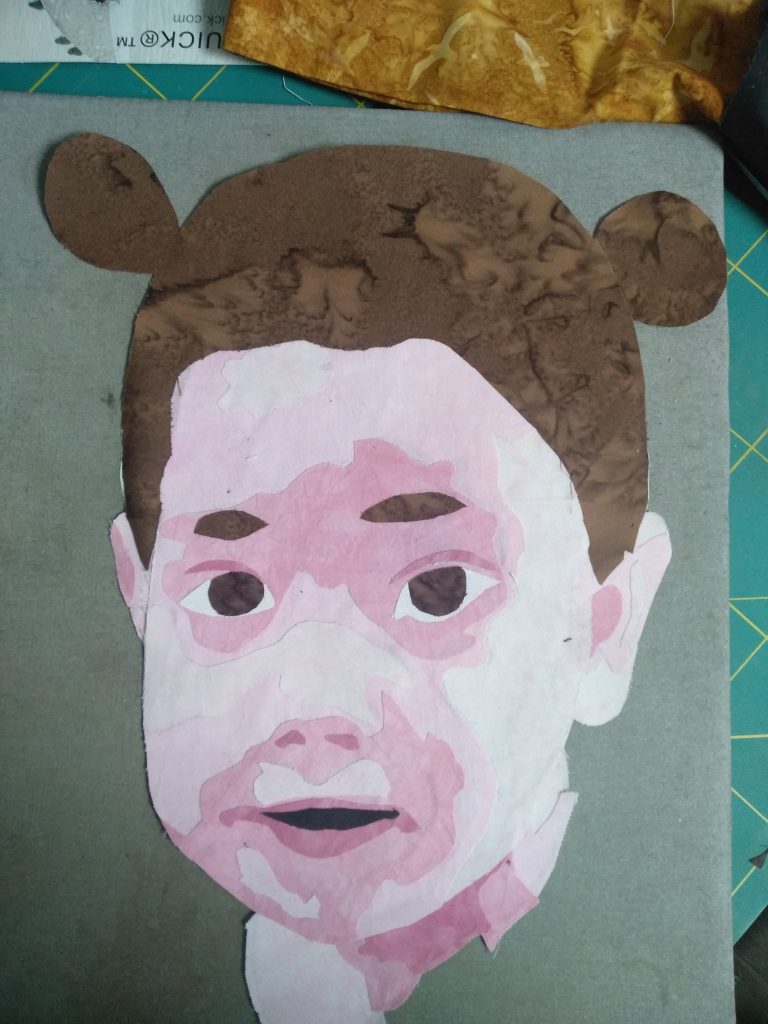
I also want to mention the mouth and eyes. In my posterized rendition, they were too hard to see. I went back to the original photo to make sure that I was getting them just right.
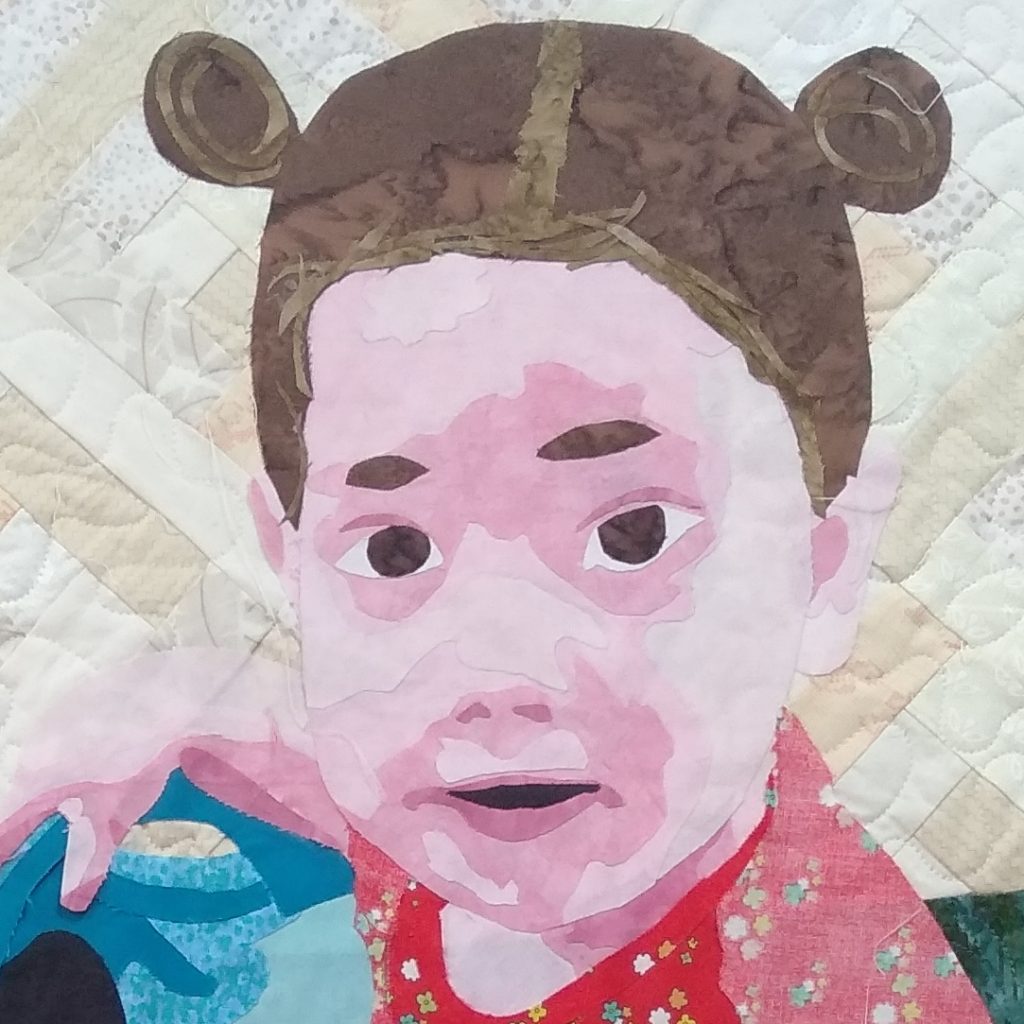
The hair needed a bit more too. I also went back to the mail photo and added a part line, as well as some wisps around her face to make it look more natural. To give the ponytails a bit more curve, I added fabric cut as spirals.
Once it’s all together, place it on the background and fuse it all down. If you’re not exactly sure where it should go, use the tracing paper to place it correctly.
Viola! The quilt is almost done! All that’s left is the quilting and binding. We’ve come a long way baby!
עברית למטה Hi Quilters! I know it’s been a really long time since I’ve posted anything. It’s been a hard, sad, scary and crazy year

עברית למטה Wow! What a year it’s been. It’s hard to believe that Rosh Hashana is here already. How exciting! There are so many things
עברית למטה As the year ends and the temperature drops it’s time to think about making a temperature quilt. It’s more fun to quilt when