
Going on Vacation
עברית למטה Hi Quilters! I know it’s been a really long time since I’ve posted anything. It’s been a hard, sad, scary and crazy year


I hate waste. I find that a lot of quilting is taking a bigger piece of fabric and cutting it down an getting something smaller in the end. I can deal with that – it just makes sense. What you get is much nicer than you start out with. What I have a problem with is that sometimes parts of the fabric wind up as little pieces that are left on the floor that I can’t use. It drives me crazy. I find myself looking over that fabric a lot like Gollum from Lord of the Rings – My precious…. I save it all and I hope to do something with it eventually.
The way that I use to make flying geese was to take a rectangle of fabric and sew 2 squares on it, diagonally, and cut off the part that wasn’t needed. Don’t get me wrong, I keep all those little pieces of fabric and I make half square triangles out of them, but so far, they are just sitting in a bag, waiting for me to play with them. It just seemed so wrong.
That’s all in the past (or at least mostly in the past). I have found a new way to make flying geese that no longer leaves any leftover fabric. And even more amazing, it’s so much faster that my old way of making them.
I didn’t come up with this myself – people that are far smarter than me did. I’ve seen it on a few websites, so I’m not sure who to attribute it to, but I want to say a big thank you to whoever did! In case you haven’t been introduced to this method yet, I thought I’d share it with you.
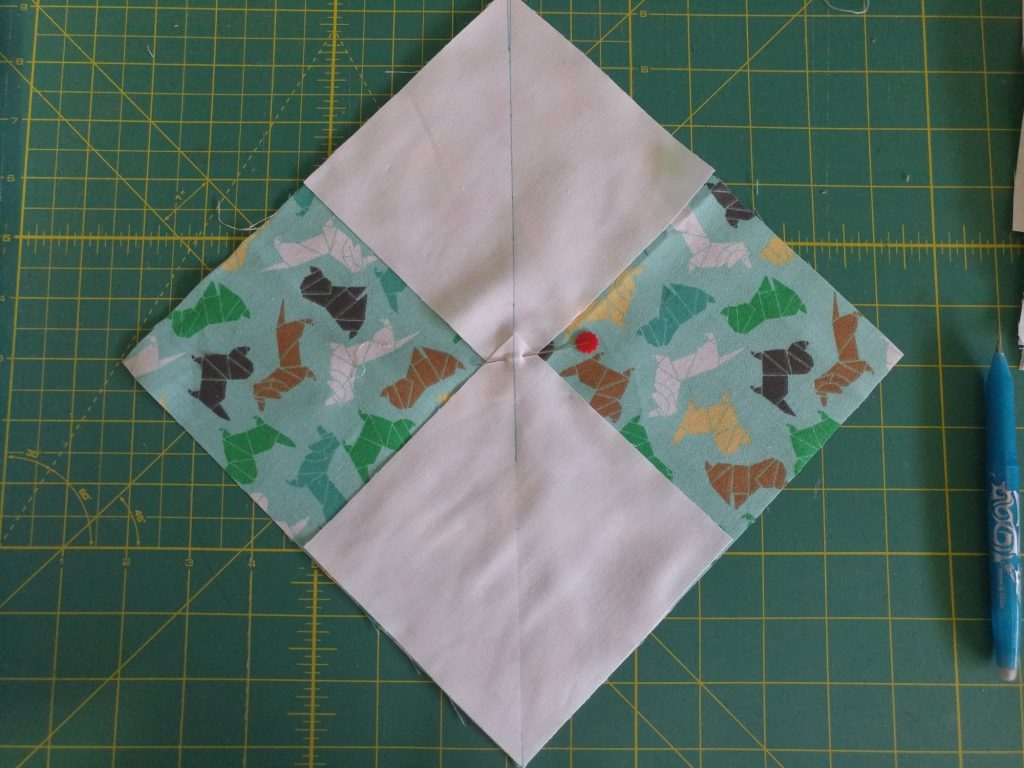
Add 1 1/4″ to the size that you want your flying geese to be. If you want the geese to be 5 inches, cut your square (main color) 6 1/4″.
For the background fabric, add 7/8″ to the the finished height of the geese. In this case it would be 2 1/2″ + 7/8″ = 3 5/8″.
For every one geese fabric you will need 4 background fabrics.
That’s the hardest part of the whole thing. If you are still with me, the rest is easy peasy.
Place background squares in opposite corners of the geese square. Pin and mark a line down the center of the squares.
Sew a quarter inch seam on each side of the marked line and cut on the line to separate into two halves.
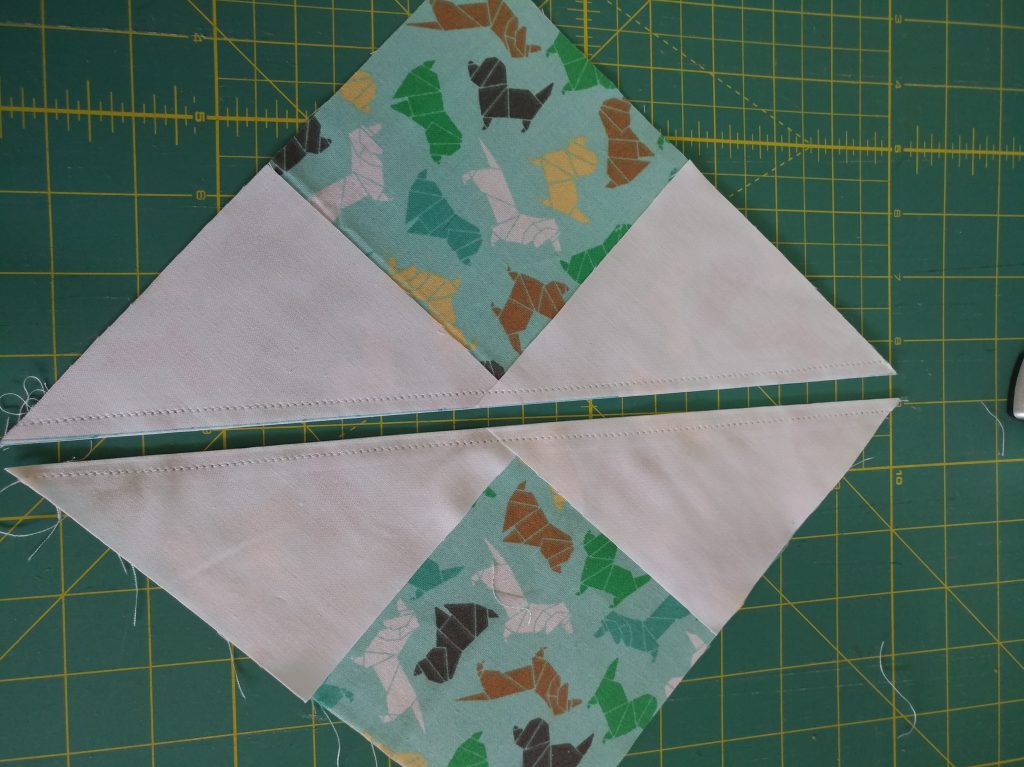
Press the the seams to one side. Add the last squares of background fabric to the point of the triangle. Mark a center line and sew a quarter inch seam on each side of the line.
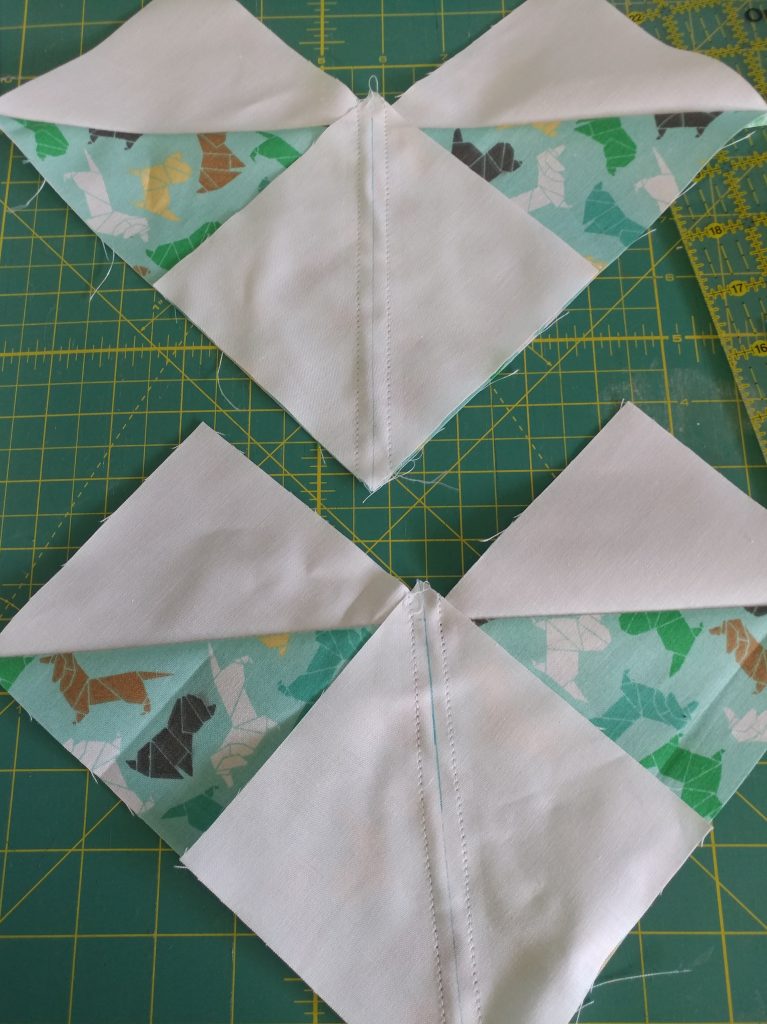
Cut down the center line and press open.
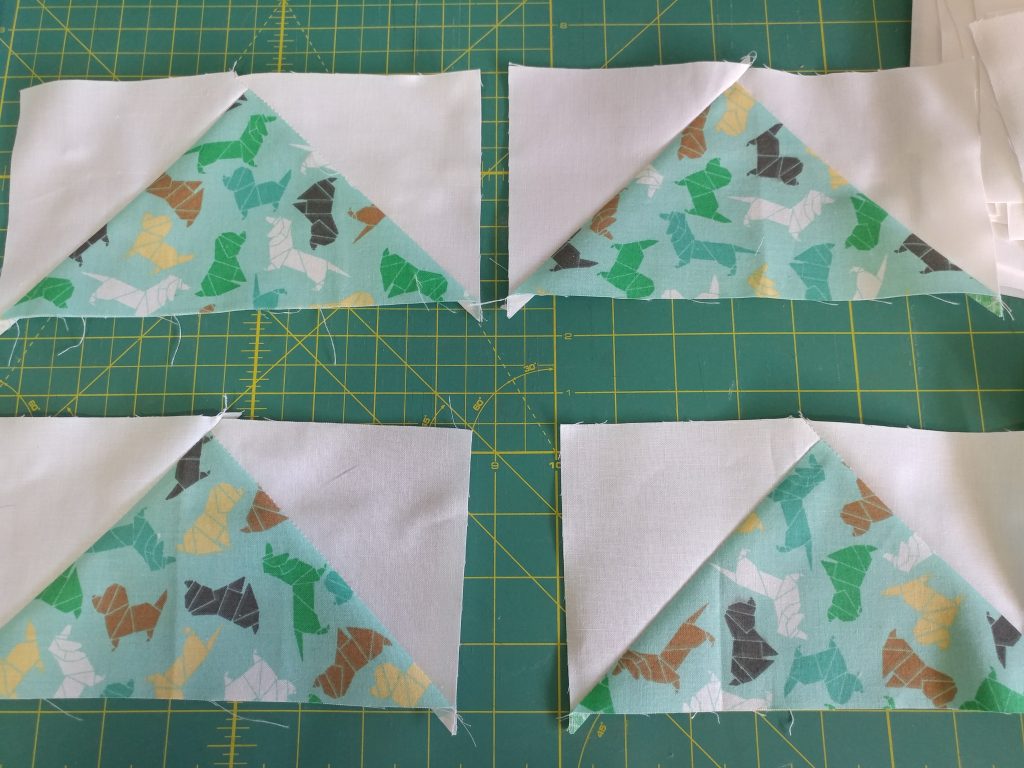
Viola! Just like that, you have 4 beautiful flying geese and no fabric waste.
One thing that I need to point out about this method is that it only works for non-directional fabric. If yo want all your fabric to show up in the same direction, you’ll need to go back to the the old method.
Originally I was making flying geese that I was going I to stack one on top of the other, but my I saw that my doggie prints were going to go every which way. After I made the geese, I changed the pattern.
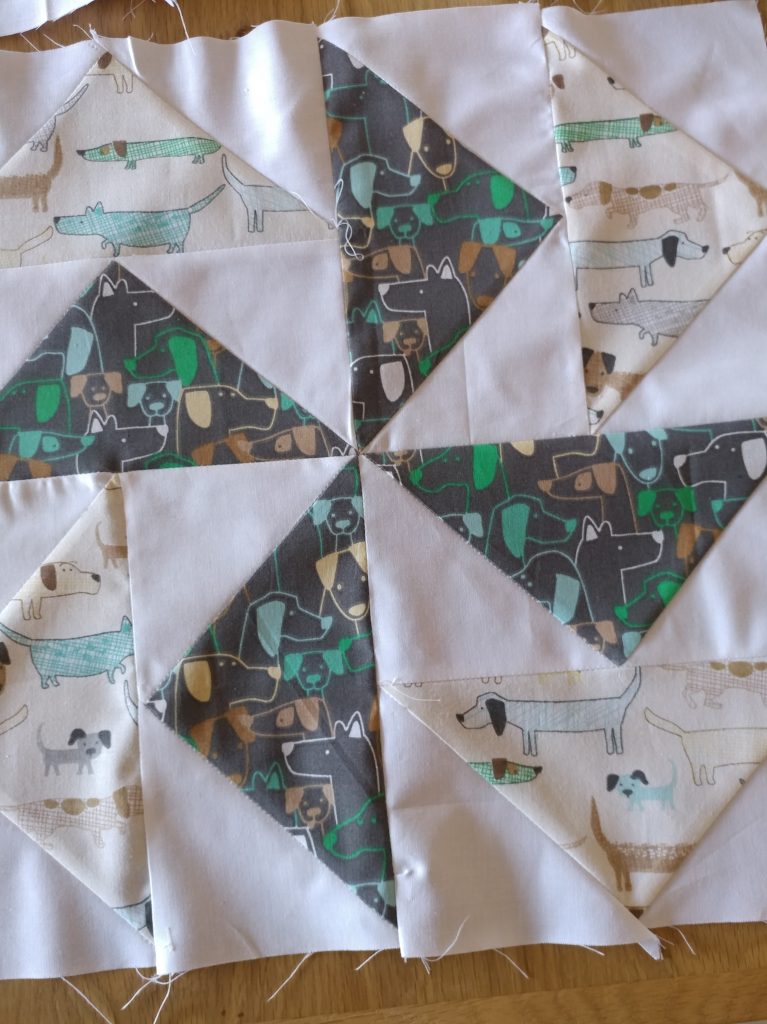
My doggies are all lined up nicely, as they should be and they are playing well together.
I hope that you enjoy making your geese as much as I enjoyed making mine!
עברית למטה Hi Quilters! I know it’s been a really long time since I’ve posted anything. It’s been a hard, sad, scary and crazy year

עברית למטה Wow! What a year it’s been. It’s hard to believe that Rosh Hashana is here already. How exciting! There are so many things
עברית למטה As the year ends and the temperature drops it’s time to think about making a temperature quilt. It’s more fun to quilt when